

Happy Friday everyone!!!
I'm back today with my last installment of the Disney 8 x 8 Mini Album that I created for my daughter. Every day last week I shared posts on how I created this mini plus a tutorial which included templates for you to use. You can see that post here (there's a link in it which takes you to a hidden page) and it's been updated to include a tutorial on page construction. I have photos of page 6 to share so let's get started.

I used black cardstock as the base for all of my pages. This is my tri-fold page but I didn't stop there.

To the left and right pages I added small flaps.
~page 6 opened~

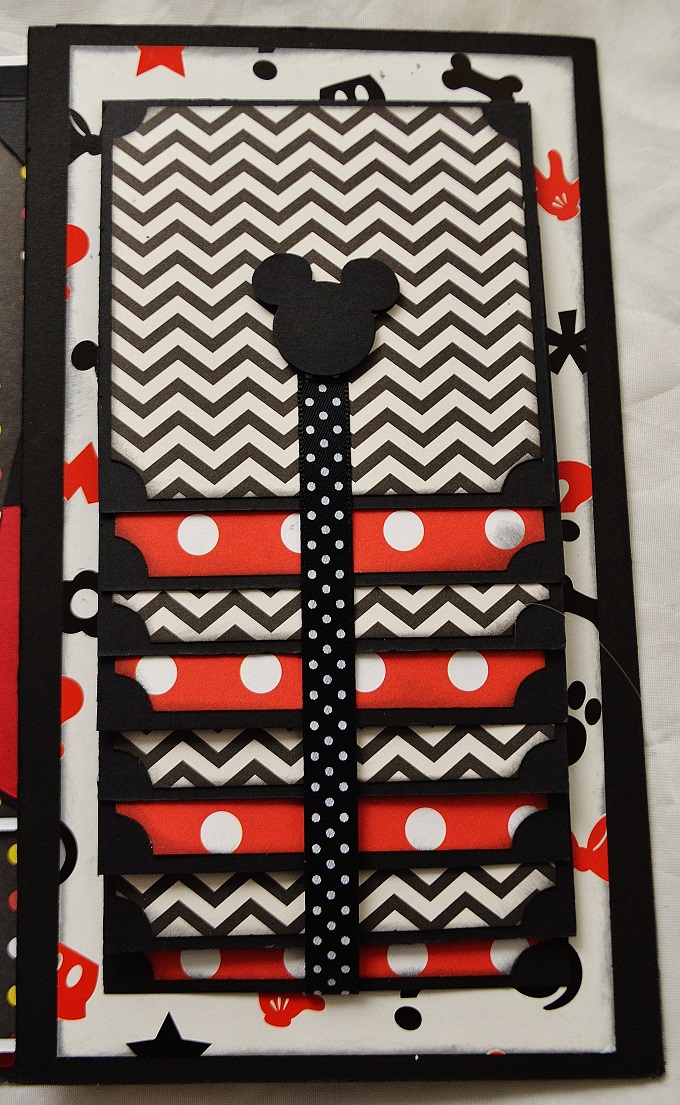
A close up of the large waterfall photo mats I created.

I didn't stop with the addition of side pages nor flaps...I went upward and outward and added 3 large accordion style photo mats...if you flip it down it reveals...

3 more photo mats

I wanted this page set to hold several photos. As you can see from this peek there are waterfall photo albums on both outer flaps plus large waterfalls on the side pages. There's a fold down flap with a pocket for storing tickets, etc.. I cut hands from a SVG file (link below) but this time I reversed the layers and used black on top, they'll hold a large photo in place. I layered Mickey and Minnie silhouette heads together and tucked it into the deep pocket. She can journal on one side and place a photo on the other side.
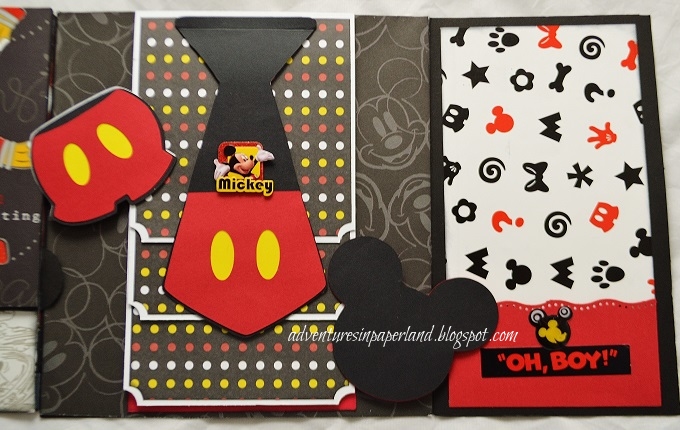
-Right side pg and pocket flap-
These Disney elements - Mickey's pants, tie and head w/ears - are from SVG files that I purchased on Etsy here. I cut them with my Silhouette Cameo and layered the elements. There's a magnet in the tie that matches up with one on the base layer of the waterfall album that keeps everything in place. As you'll notice I kept everything on this page spread symmetrical.

-Left pocket flap-
Everything tucks neatly into the pocket.

The back side of my photo mat tag and cut outs.

Again I used magnets to close the waterfall album and I added 3D Disney stickers to each tie. This one features Mickey's head while the right side tie features his pants. The ties are in a different SVG file which you can find on Etsy here.

I created 3 large photo mats that graduate in size. On the 1/2" strips you can add another dp to cover which I plan to do as a finishing touch.

I love these Disney papers and to add some visual interest I used the We R Memory Keepers Stub corner punch on the bottom corners on the front side and the upper corners on the reverse side.

When you close the page you can see the back side of the right page, there's a deep pocket for storing maps, daily itinerary, etc. I used another cut out from the SVG file on the bottom and added a flip style album at the top.


On the outer flap, on both sides, I created matching waterfall albums with 8 double sided photo mats. Another photo can be added to the base paper which has a 3.5" x 5" photo mat giving her a total of 17 photos per album.

-opened-
To close my waterfall album I added a magnet to a double sided Mickey head (EK Success punch) and glued it to polka dot ribbon. The magnet pairs up with a hidden magnet under the first photo mat and I used Basic Grey's large magnets. They're strong and will keep the album closed.

This photo shows the back page (on left) and the front side of page 6 on the right. Both feature more photo opportunities, a flip style album on the left with a deep pocket then on the right there are 3 photo mats for Tomorrowland pictures.
That's a wrap for my Disney Mini Album, thanks for looking!
Have a great weekend everyone, wherever you are.
Hugs,
Lisa

No comments:
Post a Comment