Pages

Saturday, May 31, 2014

Life is a Beautiful Ride


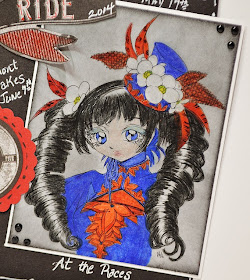
I'm back today to share my DT project for the halfway challenge at The Squirrel and The Fox. Our sponsor, Make It Crafty, is sponsoring us for four weeks and I have a fab image-Ardelia-to share with you on my tag. For some of us in the US we are celebrating the Triple Crown races during May and June and this year I'm excited about one horse in particular. It's been a while since a horse won all three races (Affirmed in 1978) but I think California Chrome has what it takes. I certainly hope so! I watched all three of the Triple Crown races with my Dad when Secretariat won in 1973 and it's something I'll never forget. All of those memories came flooding back when I visited the Kentucky Horse Farm in Lexington, Kentucky recently. There's a statue of Secretariat at the visitor's center entrance and his presence is felt throughout the park. If you're a horse lover it's a great place to visit and I highly recommend it. 

I colored Ardelia with Prismacolor pencils and used black soot Distress Ink over my image panel to create a retro look. The corner dots were made with Ranger's Enamel Accents-black. 

I dabbed Adirondack Snow Cap over a laser cut wood state shape (California) and the 3 and 5 on my tag are the numbers California Chrome wore in first two races. I don't know what number he'll wear in the Belmont Stakes on June 7th but I hope it's the winning one. He's a great horse and I love his story. :)


A big thank you to Zoe of Make It Crafty for her sponsorship of us for four weeks and for supplying the DT with beautiful images to create with. Check out her online shop and the terrific coloring tutorials she shares for coloring digital images. 


Make it Crafty

Prize is a $10 AUD voucher to our randon draw winner.

You have a second chance to win another $10 AUD voucher by using a MIC digital image on your creation.


Good luck!

I'll be announcing my blog giveaway tomorrow live at 9am CST so be sure to check back for all the details on how you can win my prize package. Oh, one more thing-saw Maleficent yesterday with my girl and it was awesome! 

Hugs,
Lisa xx

Wednesday, May 21, 2014

There's No Time Like the Present


to join along with Tim Holtz's 12 tags of 2014!


I have always wanted to participate and once again the year started off a bit rocky and I just couldn't swing it. The type A side of my personality said just wait til next year and join along but I'm glad I told that side to shut up lol. I may be joining in the 5th month but that's okay and at least I'll be in the swing of things when January rolls around next year. :) For my own personal happiness I am making tags for January-April and at the end of this post I'll share January and February with March and April making a debut with next month's tag. You can check out Tim's awesome and very detailed tutorial HERE and also link up your own tag. There's still time to join along in May if you'd like to. 

I placed some of my personal favorites on this tag and used a Shadow Press-good life on my tag because that's my goal, to live a good life, which is why the arrow points there. I also enjoy traveling, the written word, playing games, cogs/gears because I'm married to an engineer and most days I like him lol ;) and last but not least a bee because I love winged things (butterflies, dragonflies, bees, and birds to name a few).   


I love Tim's papers and some of my favorites made it on this tag. I distressed the edges with walnut stain distress ink and I find myself using it more after completing Tim's online class Chemistry 101. I tend to default to black soot because I love how black pops but I have to say I am liking this look too. Thanks Tim!

I'm entering this tag in the following challenges:
(scraps of paper, jute string, raffia, manila folder which I made my tag from)
PDE Linky Party-Bugs (I have a bee on my tag)


January and February-12 tags of 2014 

January

You can click the badge on my left sidebar to go to the archives to see what the theme/focus is for each month. The three words on my weathered clock are what I hope to accomplish this year. It was interesting because I did not have foil tape when I made this tag so I had to improvise. After searching my craft room I found foil sheets and used Tim's weathered clock die to cut my shape, I embossed the center with an Alterations cogs/gears embossing folder and used stream alcohol ink as it was the only thing that would stick to the foil. Now, I have foil tape as it makes life a little easier and I can use my beloved distress inks. I used another favorite of mine on the background-Tim's new clockworks layering stencil. I stamped my sentiment and added some remnant rub ons, Idea-ology metal trinkets, a ticket and jute string and teal raffia (from my stash) completes it. 

I'm entering this tag in the following challenges:
(I used three elements-metal, paper, rub ons)

This tag was a blast to make for two reasons-first, I love the technique Tim shared and it makes for a fabulous background and second, I am a big Alice fan (in case you haven't noticed) and I finally found a happy place for my rabbit charm. The stamp is by My Favorite Things and I love it too!

I'm entering this tag in the following challenges:


The next order of business for me is to create a grunge board book to hold all of my tags. I'll probably share it sometime next month.  

Thanks for looking today and a big welcome to my new followers and Facebook friends. :)
Have an awesome day!!!
Lisa xx


Saturday, May 17, 2014

Small Spaces

Artist Trading Card


Hello and Welcome!

It's time for a new challenge at The Squirrel and The Fox but before I go any further I'd like to interrupt this blog post~

to wish my dear husband a very Happy 28th Anniversary today. I can hardly believe we've been married nearly thirty years, raised two wonderful children and now find ourselves as empty nesters. Where has the time gone? I look forward to growing old with you dear and just want to say how much you have blessed my life and I love you. 

Now back to the challenge - Let's Hear It For the Girls - and our special month long sponsor Make It Crafty. You read correctly, Zoe is sponsoring us for four weeks and the DT will be back on June 1st  (half-way) with more inspiration and I'll be sharing one of Zoe's fabulous images then.


SPONSOR

Prize is a $10.00 gift certificate to the online store.

Bonus Prize - use a MIC image to go into a second draw to win a $10 Gift certificate to their store.


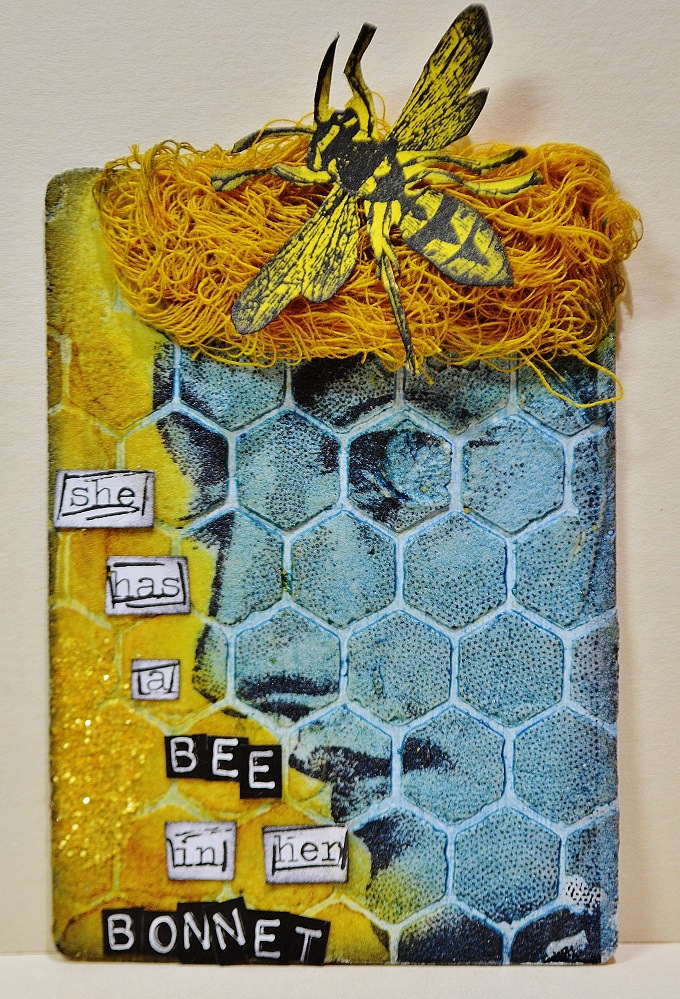
As for my ATC I had fun playing with a honeycomb layering stencil by Tim Holtz and embossing paste. I dried it with a heat tool and stamped the lady's face over the textured background in Archival Jet Black ink. Color was added with Mister Huey's Powder Blue and Dylusions Lemon Zest ink sprays and I spelled out my saying with Tim's chit chat alpha's and computer generated words. I inked some gauze with mustard seed distress stain and formed a bonnet for her, then stamped a bee on white cardstock and sprayed the image with Dylusions lemon zest and fussy cut it. I love old sayings and this one in particular always makes me chuckle. I remember hearing my maternal grandmother say this and I find myself saying it as well. It's a challenge to create in such a small space but I like ATC's so you'll be seeing more of them. 


Thanks for the visit today and I hope you enjoy the rest of your weekend. 
Before I go I'll quickly share that I will be hosting my very first blog give-a-way beginning June 1st to celebrate a milestone in my life so plan on checking back to get all of the details to win my prize package. 

Hugs,
Lisa 

Wednesday, May 14, 2014

Memories

{front cover}


I'm super excited to share my project with you today because it's one that is dear to my heart. I created a special Memory Book for my DH for Father's Day and I had four specific challenges in mind when designing it. I'm playing along with the second Compendium of Curiosities 3 Challenge which focuses on Tim's Distress Glitter technique. As you can see I used the technique on the die cut Fleur de Lis on my cover. You'll find this technique on pg. 56 in his Compendium of Curiosities III book. You can find Linda's {our hostess} rules and info for the CC3C here if you'd like to participate, it's not too late to jump in. You can get your own autographed copy of Tim Holtz's new book here

Cc3c_02_Header


The second challenge I'm playing along with is Fond Memories at A Vintage Journey. I love the theme of this challenge and they too are big fans of Mr. Holtz. :) In fact, Tim inspired the challenge blog and projects are encouraged to reflect his style,  feature his products or his techniques. One or all, it's your pick. I think all of us have products in our crafty supply stash that Tim has created. If you're unsure of what his style is visit his blog here or visit rangerink.com to view his technique videos.


To create my book I began by altering a 7 Gypsies Bare Naked Book with various 12x12 papers by Tim and I used his distress inks, stains, paints, remnant rub ons, and Alterations dies by Sizzix. This book actually has two covers and is reversible. I'll put it on a photo display stand for easy viewing and place it somewhere we can see it everyday. Before I share some of the pages {it's about 90% finished} I'll show you the other front cover which ties into the third challenge I'm playing along with

Butterfly Challenge #7  - use a butterfly and a doily

You'll find a chipboard butterfly, a stamped butterfly {from Fairytale Frenzy by Tim} that was embossed and a butterfly border stamp at the bottom. The doily is actually a die cut -  Large Layering Doily - by Taylored Expressions
the birds are remnant rub ons by Tim :)


My FIL's high school graduation photo {circa 1940} and another as a new enlistee in the U. S. Navy.
All of the background papers are by Tim.

My FIL in Japan in early 1945. 
This is the only photo where he had a moustache. ;)


I love Tim's canvas tape trim and since my MIL was a talented seamstress it seemed a great time to use it. Upon graduating high school she left her small town and headed for the bright lights of the big city. Such a wonderful photo to have and cherish.


This is my MIL with two of her brothers. The background is one of Tim's fab resist papers and I used various distress inks to add some color. She certainly loved her big brothers and both of my in-laws came from large families so holidays were always a fun time to get together. 


My in-laws were introduced by a mutual friend and it was pretty much love at first sight. One of their favorite things to do was go to "picture shows" so this is the perfect paper to place this photo on. One of Tim's rub ons can be seen in the upper right corner and on the larger ticket where I did some journaling.


I used color photos for this page because it reflects a more modern time. The top photo is my dear hubby on the lake we live by, with his parents in tow for a boat ride in his newly refurbished bateau (flat bottom boat) that they gave him. They decided to sell their fishing camp and asked if he wanted the boat. It was an instant yes and he loves it for the sentimental memories it holds of him fishing with both of them on Old River in south Louisiana. The bottom photo was taken by me of the two of them on the Branson Belle riverboat on beautiful Table Rock Lake in Branson, Missouri. 


The final challenge I am playing along with is Simon Says Stamp Monday challenge which is to use the letter M. I did-M for Memory Book. 

That's all for me today, glad you stopped by and a big welcome to my new followers. So happy to have you! I'll be by to visit everyone soon, have an awesome day!

Hugs, 
Lisa

Tuesday, May 13, 2014

Playing with The Red Queen

{mixed media art journal page}


Here Comes Summer

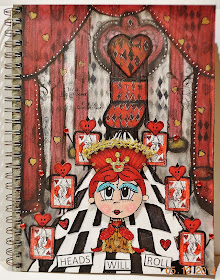
We have a brand new challenge over at Top Tip Tuesday and I am hosting this one. We are looking for anything that reflects summertime on your paper project, hence the flowers on my art journal page. This fun digital image was supplied to me by our sponsor, Bugaboo Stamps, and it's called Bobblehead Kid Princess. However I used her to create the Red Queen from Alice in Wonderland via Tim Burton's version. I loved playing with this digi and I created another page which I'll share in a minute. 

First, a little housekeeping though because we have a brand new teamie here at TTT and her name is Kat. I hope you'll drop by her blog and give her a big welcome!

To create my page I used Faber-Castell Gelatos for the background, stamped the ranunculus rubber stamp on both sides of my page with Archival Jet Black ink and colored it with various Faber-Castell Pitt Pens. I added some texture to my page with Wendy Vecchi's Checkmake stencil and her fab white embossing paste. I titled my page using a font {Channel} that I found on Pinterest and matted it with cardstock and a Spellbinders die created my wrought iron fence and added the finishing touch. I should note two things-I drew heart shaped sunglasses on the digi to mimic those worn by the Red Queen in Tim Burton's AIW movie and after applying my gelatos and color to the flowers I white washed the background with Picket Fence Distress Stain, then I applied more color to the flowers. It toned everything down and gave my art journal page a subtle look.  

Here are a few close ups


Now for my second page which is quite different. 

I love Dyan Reavely's Luscious Leaves 9x12 stencil and it helped me create this awesome floor in the Red Queen's throne room. I spread a coat of Wendy Vecchi's black embossing paste over it and used white acrylic paint {2 layers} to provide the stark black/white contrast of a checkered floor. The card images are from a blueprint stamp set by Tim Holtz and I used them for the body of the knaves and a Spellbinders heart for the head. I drew the background freehand and colored the pillars and curtains with Faber-Castell Pitt Pens. Tim's harlequin layering stencil was used on my background to create depth and I added a few here and there just because I love them. :)  

The title was computer generated and matted to a piece of black cardstock

He may be in the shadows but the Mad Hatter makes an appearance

and a knave

and yes, It's all Fun and Games Until the Queen Arrives


I'm entering my art journal pages into the following challenges:
eclectic Paperie ePlay Challenge-Get Stenciled!
Craft My Life Challenge-Anything Goes
613 Avenue Create Challenge-Anything Goes 
The Artistic Stamper Creative Team Blog: May Challenge-In the Garden
{I am entering the first art journal page for this challenge, the ranunculus rubber stamp is by Stampendous and I stamped it twice on either side}


Thanks for looking and I hope you'll join us for our Here Comes Summer challenge at TTT.
For more inspiration please visit my teamies blogs, you'll find their links on my right sidebar.

Have a terrific day!
Lisa xx


Friday, May 9, 2014

I'm on a New Journey


I'm so glad you dropped by today! 
A big welcome to my new followers and to those visiting here for the first time.

I'm starting a new journey today and it's one that excites me greatly because when I finish I will have worked my way through the techniques in Tim Holtz's brand new Compendium of Curosities III  book. I have I and II and refer to them all the time so to be able to play along with Linda Ledbetter's Compendium of Curosities 3 Challenge  is a thrill for me. She has a few rules which you'll find HERE and this one in particular is important and it's why I will not be sharing any techniques with you.  

From Linda-
One rule we’re very committed to, though: We will not be posting technique instructions on our blogs, and we kindly request that you don’t either. All participants should work from their own copy of A Compendium of Curiosities, Vol. 3. We require this out of respect and appreciation for Tim, who put countless hours and passion into writing the book. If you don’t have a copy, you can order one directly from Tim, who will even autograph it for you!


Challenge #1 - Paint Marbling

I hope you'll join me on this journey and together we can celebrate the creative genius, the one and only, Tim Holtz! If you click the link to his book {above} you can get your own signed copy from Tim. 


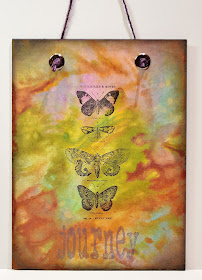
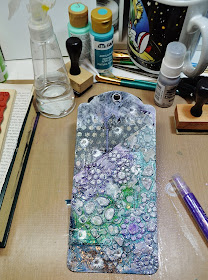
Here are few photos of my project and I took the minimalist approach to let the background speak for itself.


 I love Tim's paint marbling technique which you'll find on pg. 43
(the lighting in my craft room does not do this justice)

I adhered my 6x8 background to black chipboard and inked the edges with black soot distress ink.


I added two metal grommets

Tim's purple jute string was added so I can hang this piece

I used two of Tim's stamps -Papillon and Traveling Friends-on my wall art


I plan to hang this in my craft room as a daily reminder of the fun journey I'm on. Thanks for looking today and a big thank you to Tim for the years of inspiration he's provided.  

Happy Mother's Day to everyone celebrating this Sunday!
Hugs,
Lisa


Monday, May 5, 2014

It's a Glittery Affair!


Hi there, I recently found a *new to me* challenge - Butterfly Challenge  - that I wanted to play along with. This is the sixth challenge so far and the Glamorous Butterflies theme intrigued me. To meet the challenge requirements my butterfly had to glitter and sparkle. I already had this tag made and planned to debut it soon so I quickly added Stickles to the large butterfly and now it's a glittery affair. Why the haste, the challenge ends tomorrow!

Edited to say a big thank you to Mrs. A for choosing my tag as her Top 3. I'm so excited!


Here's how my mixed media tag came to be...

My base is the back of a Graphic 45 label holder package.  
Love that it's shaped like a tag and it already has a metal grommet.

I gave it a coat of black gesso.

There are several layers on this tag but this is how it originally started out. 
I added strips of book paper with mod podge, then I inked a distressed dot stamp with Versamark and stamped the base with it. Perfect Pearls were brushed over the stamp to highlight the distressed dots. Then I added more texture with a MPD Gears stencil  and modeling paste and started coloring it with various acrylic paints. Pure randomness, gotta love mixed media. :)

To alter the large butterfly {which is laser cut wood} I gave it a coat of black gesso, dried it with a heat tool, inked a text stamp with Perfect Medium and stamped it on my butterfly. I used Perfect Medium because I planned to go over it with Perfect Pearls and the resins in the medium grab the the mica  powder and keep it there. I brushed the excess off to reveal the resist effect the medium gives. To set the Perfect Pearls I gave it a light coat of  hairspray and let it dry. 

 For the smaller butterfly I die cut a butterfly from Tim Holtz's grunge paper and gave it a coat of black gesso as well. Then I used a technique called Glittered Glass by Jules Aviles which I love. You can watch her You Tube video here. I only used the first part of the technique on the wood butterfly and the complete technique for this one. I highly recommend the video and you'll see that it proves useful in creating faux metal pieces as well.  

Time for a little bling

I love the ease of Stickles and I applied purple to the outline of the butterfly and starry night on the inside detail. It definitely glitters and sparkles now. :)

The third butterfly is a Spare Parts brad and I altered the metal edge with Adirondack Acrylic Paint Dabbers. The letters are Tim's Ransom plastic letters and they were altered the same way. The rose trim, lace and pearls were in my stash as were the altered Prima paper flowers. A little ribbon and trim and my mixed media tag was finished.


I may be back to edit this post and join a few more challenges but for now I need to get this one linked up to the Butterfly Challenge or I'll miss the boat. Thanks for looking today, hope you enjoyed your visit. 


Okay, I'm back to play along with these challenges:


{I used a MPD Gear stencil}


{I have two pretty paper Prima flowers and two rows of gorgeous rose trim}

{here's my five-butterfly brad, paper flowers, lace trim, wood butterfly element and Tim's ransom letters. Note: I could also add pearl trim, ribbons, grunge paper butterfly but you get the idea} 

{Leftovers/Scraps that's what they are looking for, okay I'm using a leftover G45 piece of packaging that I used as the base for my tag. Also, I used scrap book paper that was lying on my desk and it's part of my bg as you can see in the photo below}


Whew! Now I'm done and again, thanks for looking!
Oh, and thanks Sue. ;)

Hugs,
Lisa 


Saturday, May 3, 2014

A Card in Under Ten


Hello and Welcome!

So glad you are here today, we have a brand new challenge starting at The Squirrel and The Fox and it's Mother's Day. It's time to celebrate mothers everywhere and I made this card for my mom. There are no embellishments on it for a reason, she has Alzheimer's and it is not safe to include them. The beautiful tulip wreath image is by our current sponsor, Doodle Pantry, and it's pre-colored. Since the work of coloring was done for me I was able to put this card together in ten minutes.

This card came together in a snap by using scraps including the punched border. Dusty Concord distress ink added color to the outside of the wreath and a purple gel pen created my faux stitches. Some twine was secured to the back and I stamped I love you on the front and used a Happy Mother's Day sentiment on the inside. I'll be spending Mother's Day weekend with my mom and enjoying some quality time with her. She's the last living parent between my husband and I so we both felt it was important to be with her this year. Gratefully, she still knows who we are and that's such a blessing. 
  

SPONSOR
Prize is a $10.00 gift certificate to the online store.

Thank You Doodle Pantry for supplying the DT with images to create with!


Thanks for looking today, please pay my teamies a visit to check out their creations using digital images from the Doodle Pantry. I hope you'll join us for our Mother's Day challenge and I'd also like to congratulate the Winner and Top 3 of our previous challenge. 

Hugs,
Lisa