Front Cover
I'm back today with a scheduled design team post for The Cutting Cafe. It's rare for me to post on Sunday but I was having so much creating this crafty planner that I pushed myself into blogging and taking pictures late last night. Some of the photos will be dark and hopefully I can remedy that later today. I chose to purchase a binder from Wal-Mart and use a hole punch to insert the pages. It is not finished but at least I have several categories completed and will continue to work on the stamps and die-cut sections for a while. ;)
I cut out the images on the right and adhered them to the front of my binder.
Table of Contents page
One page of my Distress Ink pads
One page of my Distress Crayons
Distress Markers
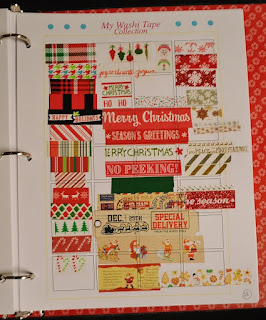
I do like the look of keeping the washi inside the boxes but on some of my pages I went with a freestyle look. The idea is to customize this set to suit your needs. :)
On this page I did not cut sections and place in each box. I wanted to see the patterns / words so I made columns instead. The good thing is no one will see this but me. ;)
I did the same for my Christmas washi.
I love the idea of using these pages to keep a record my stamp sets.
There are various pages to choose from as you'll see below.
Die-Cut Words from Echo Park
I used the printable pages from the Craft Supply Planner Printable Set to create my planner.This is an extensive file with pages to organize all of your crafty items. In fact I realized quickly that I'll be making 3 planners and dividing them up into different categories with stamps and die-cuts having their own individual planner. This is a great way to keep up with ink pads, markers, paints, washi tape, embossing powders and all of those items that are sometimes hard to remember when your standing in a store trying to decide if you have one or not. There's nothing worse than getting home and realizing you already owned an item and have to return it or ordering online and ending up with a duplicate.
Here are a few more pages available in this printable set...
I have my tabs printed but I haven't added them yet.
and there's a whole lot more in this printable set.

This file is a tremendous buy and I highly encourage you to click the link if you are looking to spend 2018 being organized in your crafty area. I plan to pop my binder in my car when I go shopping or have it handy if ordering online. It will save me time and money in the future and that is always a good thing! To see more inspiration featuring all of the various types of planners be sure to visit The Cutting Cafe's blog for the design team post later today.
Have fun crafting everyone!
Lisa xxx


