

Front
Yesterday here in the U. S. we celebrated Valentine's Day and I want to share my first take on the loaded envelope concept. I discovered them on You Tube and I knew I wanted to make one with a Valentine theme. It is chock full and as you'll see the goodies and handmade embellishments spilled over. ;) This is a photo heavy post so let's get started. You can see the front of my loaded envelope above and here is what the back looks like below.

Back
{more on it later}

The base of my loaded envelope is a kraft clasp 6 x 9 envelope. I removed the silver clasp and decorated the front and back with Echo Park's Yours Truly paper collection. I bought the set that came with matching cardstock stickers and I love it. Some of my favorite Valentine themed paper ever! I created 3 pockets on the front using various designer papers and embellishing each layer with washi tape, stickers from the YT collection, punched elements-cupid and hearts, die cuts and round cardstock stickers by MAMBI.

The pockets were loaded with ephemera from the YT collection, die cut hearts by Verve, and vellum gift packs with assorted punched and die cut images. I tucked in a flair flower button and heart paper clips as well. A silver Heidi Swapp glitter bow sticker makes an appearance on the second pocket and I cut a black doily border for the top 2 pockets with MS's doily border punch.

You can see (lower left) a handmade bookmark which I tucked into the middle pocket. I also included die cuts by Echo Park, Tim Holtz and Verve Stamps for her to use as well. The small vellum packets were made by using scrap pieces, folding them in half and adding washi tape to seal the edges.

I used a paint chip sample to make the bookmark, cut it to size and added some die cut embellishments and gifted her a vintage resin pink button which she can use for future projects.
She's an avid reader so I think she'll like her bookmark. :)

As a fan of Hello Kitty I thought she'd like this button and I added a charm by The Girl's Paperie (no longer open for biz) which I have hoarded saved forever for the right person. :)

I tucked my handmade paper wand into the top opening pocket and I'll share below how I made the rosette. I layered a cupcake liner, crepe paper rosette, die cut doily and 3D rosette sticker on the front. A paper straw was used for the wand and I added pretty ribbon and trim to finish it.

I wanted a large rosette for the base of my wand so I used my score board and trimmed a dp to 3" wide by 12" long. I scored every 1/4" and then punched one edge with a MS border punch. You can do this step in either order. I used two 3" x 12" strips to create this rosette. A 2" punched circle holds the front of the rosette together and a 3.5" punched circle gives the back some stability and provides a base to add a punched or die cut decorative base for the back. I highly recommend using glue to adhere the two strips together as well as the punched bases. It's stronger and will hold up better over time, just a tip. ;)

I made a stack of rosettes using paper, cupcake liners and crepe paper. For the crepe paper rosettes I added a border of silver Stickles to one side, let it dry thoroughly then folded in accordion style and fanned it into a circle shape. I punched two circles and added one to each side for stability. Super easy to create and very therapeutic as well. They were made while binge watching Midsomer Murders on Netflix. :)

I gifted my friend a paper rosette and added a die cut doily for her to use on future projects. The tag on the front is from the Yours Truly collection and I trimmed a dp from the collection to use in my packaging. It serves a dual purpose making the package pretty and she can use it for a future project.

In the back of the package I included various die cut doilies and hearts cut from papers in my stash.
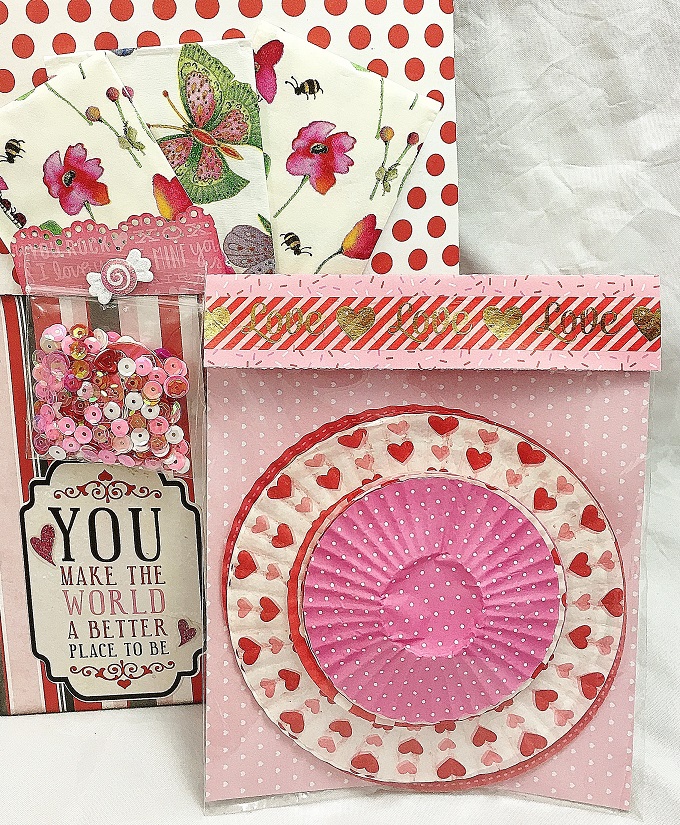
The cupcake liners were placed in recycled packaging and I added a band of washi tape to the top along with more dp's from the paper collection. It was as much fun dressing up the gift packs as it was decorating the loaded envelope!

The candy brad on the sequin packet is from Doodlebug and I included some paper napkins for her since she likes those too. The sequins are a mix from Verve Stamps and the colors are perfect for Valentine themed projects. Using a dp from the collection and a doily border punch by MS I created pretty packaging for the sequin mix.

I also included some paper cut to 6 x 6 size for her to use, stuffed some candy conversation hearts into a heart clam shell package which I ordered a while back from Taylored Expressions. A Valentine ziploc bag holds all of her chocolate treats and it wouldn't be Valentine's Day without a little chocolate. Would it? I think not!
Hope you enjoyed my share today, if you did or have questions please leave me a comment below. I'm afraid I've been a bit of an absentee blogger this year, it has already seen its share of sickness with colds and now the darling daughter has the flu. First time for her and unfortunately she has a really bad case of it. I'm here with her now to help her out and ensure my furry grandbaby is taken care of as well. Praying I can stay strong and not succumb to it, seems everyone around here is down with the flu. :(
Hugs,
Lisa

3 comments:
Lisa, your loaded envelope is wonderful..so many lovely bits and bobs, tags and pinwheels..just gorgeous.
Luv CHRISSYxx
OMG!!! Lisa, you are truly the master of sending Happy Mail. This loaded envelope isn't "just" filled with the most wonderful goodies, it's also filled with so much love! You are so talented and I really enjoyed reading your post and exploring all the beautiful crafty details on the photos. Thank you for sharing and hopefully you will be spared from getting the flu. xoxo!
Awwww... this morning I enjoyed all the lovely photos of that wonderful loaded envelope and on afternoon I enjoyed it in real and what can I say: it's even more adorable in real! ♡♡♡ Thank you, thank you, thank you!!! You are awesome! =)
Post a Comment