Thursday, July 31, 2014

Altered Composition Notebook

Typography Notebook


I'm back with an entry for the the Compendium of Curiosities 3 Challenge which is hosted by Linda Ledbetter. This is the 7th challenge and it follows the techniques taught by Tim Holtz in his latest Compendium of Curiosities III book. You can visit Tim's blog here and get your own autographed copy if you'd like to join in. It's never too late!

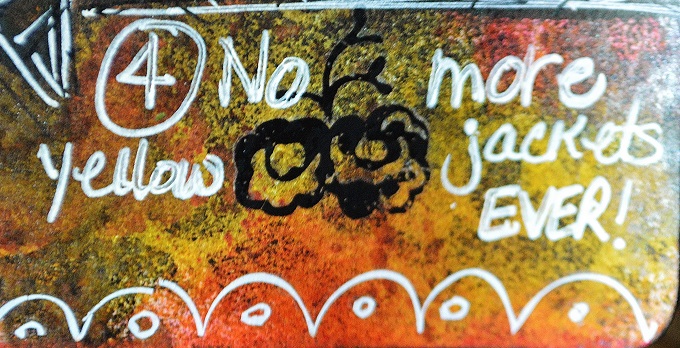
This technique-Painted Industrial-can be found on pg. 46 and it's fabulous for creating a metal look on your projects. The bonus is that it's effortless to do and can be used in so many ways. 

Here are a few close ups.

I used mine as a bookplate of sorts. The ephemera is from G45's Typography collection and Studio g alphas were used to spell out my name.

Love how it looks like real metal. :)

Inside front cover with pocket.

More ephemera from G45 on my first page. 

Back cover

Inside back cover with pocket.


I'll use this notebook for creative writing, typography and practicing new fonts for journaling. I used papers from Jenni Bowlin's Red and Black collection to cover, ephemera from G45's Typography collection and washi tape by Tim Holtz and Prima. 


This challenge is sponsored by Inspiration Emporium.
Inspiration Emporium $50 Gift Certificate
Wow, what a fabulous prize!

They are also offering participants an online discount and you'll find the code on Linda's blog.


Thanks for looking! Have a fantastic day, wherever you are!!

Lisa xx


Tuesday, July 29, 2014

12 Tags of 2014 - July Tag


my July tag


Hi everyone, I'm so excited to share my July tag  for Tim Holtz's 12 Tags of 2014 challenge. First, I am in love with the "sand" technique that he came up with. As long as you follow his step by step instructions it's a cinch to do. Second, I'll confess that when I first saw this tag and the number of steps involved I freaked a little. I'm not into tedious (at all) but I took a deep breath, read through the steps and decided it was do-able. He broke all of the components down and the best part is that I freaking love my tag! I can't wait to show this one to my DD and DIL however I am worried my DIL might want to claim it since she's a true beach lover. Guess I'll just have to make another for her upcoming birthday in September because she's not getting this one lol, it's mine. 
Ha! Ha! I love you J-

I have several close ups to share but I'd like to take a quick moment first to thank Tim and Mario for the wonderful prize I received as a June winner. It arrived in record time and it's always a fantastic day when a package arrives with your name on it from Mr. Holtz. Thank you so much!!! I love everything and I'm busy putting it all to good use. 

Now for my photos...

Mr. Seahorse 
{love the crackle!}

and

his Mrs.

There's a story here and I promise to make it brief-
there are 2 mini seahorses on my tag because I could not find a large seahorse anywhere. Online-sold out/out of stock and in stores-nada. Seriously, people! You couldn't leave me just one. ;)
 It was ditto for the bubbles embossing folder-nada. So I improvised and used a Divine Swirls folder instead. 

{When I do get my hands on a large seahorse die and the bubbles folder I'm going to make said DIL a tag and a shadowbox to remind her of the beautiful beaches in her home state of South Carolina.}

 See what I mean, told you it was awesome!
Go ahead, click on the picture to see it up close. ;)

I'm a long time fan of the Idea-ology line of products and word bands rank at the top for me.

Just had to see that sand once more and share a close up of the fabulous texture on the sand dollar and starfish. Distress products are so versatile and that's why I use them, just wish you could touch them in person. 


Fun Fact
 Did you know that the male seahorse gives birth and not the female. Click here to read more about this unique creature in the animal kingdom. Maybe it's why I have always loved these little guys. :-)


That's all for me today, thanks so much for looking and I hope you have a wonderful day! I'll be back Thursday with my Compendium of Curiosities 3 Challenge project featuring another awesome technique by Tim that I absolutely love. Oh, if I seemed animated today it's because I've had too much coffee and too little sleep. Yes, I live with a man who snores. Yikes!

Have a great day!
Lisa xx


Saturday, July 26, 2014

Make a Wish List

DLP Planner Pages-Week 29


I'm here today with my latest Documented Life Project planner pages. This week the challenge was to Make a Wish List and incorporate it into your art. If you are not familiar with DLP click here to learn more. As always I'll also be uploading my photos to the DLP Facebook group but you'll find more photos and detail here on my blog. I'm working with a moleskine 18-month planner for this challenge that I altered by adding tip-ins (additional third page also called a flap) so it gives me a three page spread and an outside flap to work on as well. I'll walk you through my process as we go. 

Left page is always my planner page and records appointments and important dates.
It also records my first two wishes.

The middle page features a TCW stencil of the NYC skyline. 

The third page records my third wish and now records a fourth as well after my DH was stung last weekend. He's fine now but it totally ruined our "quiet" weekend. 

My planner opened and showing my outside flap on right side.

Part of the challenge was to use pictures from a magazine showing our wishes and instead I chose to use cardstock stickers of places we've been or want to visit. 
Switzerland is on the wish list!

My first two wishes.

My third wish.

My fourth wish. ;)

If you've never visited San Antonio, Texas I highly recommend it. The missions there (several including the Alamo) are worth the visit and they are free. The Riverwalk downtown is a must and we thoroughly enjoyed a visit to the German community north of S. A. in New Braunfels and the French community that's west of S. A. in Castroville. So much to do there and be sure to eat at Mamacitas!!! As for Bryce Canyon all I can say is that it is a place I wish everyone could see. To me, it will always be a sacred place.

The iconic Eiffel Tower in beautiful Paris, France. 
It's magical!

Love seeing Lady Liberty for the very first time as a senior in high school. 

Wind Cave National Park is one of those rare places on this earth. We did indeed see buffalo and actually got out of the car (don't advise this) and snapped some pictures. Not the brightest idea since they can be very dangerous and run up to 35 mph but we were covered by the One who can protect us, always. Thankfully no one was hurt except when we had to run ourselves when they started charging. NOT LOL! 


That's all for me today. Hope you're having a fabulous weekend and making some great memories with those you love. I'm certainly enjoying visiting my DD and we're about to have lunch at one of our fave restaurants, Samurai's. :-) I'll be back early next week with projects featuring Tim Holtz and cutting files from The Cutting Cafe

See ya then,
Lisa xx

Wednesday, July 23, 2014

Are You a Material Girl?

Altered Bottle


**Material Girl**

There's a new challenge at Top Tip Tuesday and yes I am a day late posting my project. I'll explain a bit later but first if you love to work with jute, felt, cotton or material then simply add it to your project and you're good to go. If that's not your thing you can always interpret this challenge using Madonna's hit song-Material Girl-to inspire your project. Either way we are looking forward to seeing what you come up with!

Now for my explanation, I was all set to finish my altered bottle when I heard my husband screaming my name early Saturday morning. He was attacked by a swarm of yellow jackets and they stung him at least 40 times. After hosing him down with the water hose and giving him two Benadryl we set off for the ER. It was a long day but thankfully he never went into shock and was released to come home. However the misery from the stings lingered for several days. Yellow jackets are nasty little buggers and I am busy setting out traps for these monsters. :( We had another mishap late Sunday night with a defective electrical outlet and a near fire which did nothing to help my hubby's disposition. So there you go, that's why I am late but hopefully things have calmed down for a while. I'm happy to say that he is feeling much better and he's out of the woods. Samantha is so good to always understand when life issues come up and she even gave me a great idea for trapping these menaces. :)


I used cardstock stickers from Graphic 45's Bird Song collection for my focal image.

Another cardstock sticker from Bird Song.

I added rub ons by Kaisercraft to each side and below the focal images.

The opposite side.

The top and bottom borders are also from G45's Bird Song while the rhinestone trim was purchased at JoAnn's. To prepare my bottle I gave it a coat of Gesso, let it dry and added a coat of Apple Barrel-Antique White acrylic paint. I picked up a tip from Gabrielle Pollacco and used it to add the random spots on my bottle. I further aged it with a black Faber-Castell Pitt Pen and Rub 'n Buff's Autumn Gold then added a coat of Plaid's Mod Podge to seal everything. 

For my material element I added a strip of burgundy burlap and jute string by Tim Holtz. You can also see black crochet trim that was added below and more rhinestone trim. The topper is a leftover knob from an up cycled dresser project I did last summer. I'm so happy to find a use for it!


I'm going to enter this altered bottle in ePlay's Altered Bottle challenge

Edited: I am tickled pink to receive a Special Mention for my entry, click here to see.


A small independently run Fine Arts and Crafts shop in Penrith Cumbria UK

Our very own Samantha who works there is providing a prize
and as she is trying to build their Facebook she will also select a Facebook winner to
so please pop over give them a like and leave a comment to say you have entered the challenge
On the Top Tip Tuesday Post.
SO that is 2 winners for this challenge!!


That's all for me today. I'll have last weeks DLP planner pages on my blog Friday. Once the events played out on Saturday I totally forgot to post them. 
Don't forget to check out my teamies "material girl" creations. 

Have a great day!
Lisa xx


Monday, July 21, 2014

Get Your Party On!

Front-the numbers are also part of the cutting file.


Hi everyone!

I have some great news to share-I'm a new DT member at The Cutting Cafe. I'm so EXCITED!
A big thank you to Regina for the invitation!!!

I flipped out when I received the Party Hat Template and Cutting Files because it is SO cute and the possibilities are endless. But wait, she has two other cutting files


which she's introducing today on the The Cutting Cafe blog. She includes various type files and a PDF for those who don't own an electric cutting tool. Even though I have a Cameo now the file was so easy to just print and cut that I did. It was a piece of cake to put together and decorating it was icing on the cake for me. :) You'll have to check out TCC's blog to see the DT's inspiration using these brand new files. Prepare to be blown away!


Right Side View

Left Side View

Back Side View


After putting my template together I gathered some crepe paper together to form the top pom pom and used scissors to cut a fringe edge. Then I rummaged through my ribbon stash and decided to use a remnant piece adorned with pearls on the front and a pink pom pom trim to go around the hat and the base. More crepe paper was gathered together and glued to the base. Silver Stickles was applied to the edge and to the ends of my fringe pom pom. Recollections paper butterflies were randomly glued to my hat and I cut up a pink swirl bling (also by Recollections) to create my butterfly trails.

It was so much fun to make and I'm looking foward to my time on this fabulous design team!
Thanks for looking today and be sure to visit The Cutting Cafe to view all of the wonderful cutting files Regina offers. I'm sure you'll be seeing more of these party hats right here on my blog as well.
  
Have a fantastic day!
Lisa xx

Friday, July 18, 2014

Document Life Project-Week 28


{add an Instagram or other tiny photo to your page}


Hi everyone, hope your weekend is off to a great start. 
I'm running a little behind with my DLP planner pages but we knew that was going to happen, didn't we? ;) I do have Week 28 to share today and Week 29 will be posted in the next day or so. Then I can start on the current challenge which goes live tomorrow and hopefully get caught up.  

So what's DLP? It's one part planner, one part art journal and one part weekly challenge. You can read all about it here if you'd like to join in the fun. 


Some closeups of each page.

Planner Page
I used stamps, rub ons, 3D butterfly, acrylic paint, Sakura white gelly pen and a Pink Rose Painters pen to create it.

Journal Page

Journal Page

Both of my journal pages feature photos of my children and our first furry child, our Sheltie named Rascal. I added more 3D butterfly stickers, rub ons and Dylusions stamps (flowers and leaves) which I colored with Faber-Castell Pitt Pens. Doodling and washi tape add visual interest and finish my pages.  


The page on the right is my outer flap. I printed a free butterfly sheet which I found on Pinterest and fussy cut each butterfly. After adhering them to my page using Liquitex Matte Gel Medium I shaded each with a black Faber-Castell Pitt Pen and added rub ons. 

Here's a close up of my flap (tip-in). 

(The flap, or tip-in, is a third page that is added to create a 3 page spread in your planner for art journaling.) 


All of my backgrounds were created using various acrylic paints and the pens/markers shown below.


That's all from me today, thanks for looking!

Hugs,
Lisa


Thursday, July 17, 2014

Capture the Magic


I'm back today with my 6th project for the Compendium of Curiosities 3 challenge sponsored by Linda Ledbetter. I'm working from my own copy of Tim newest book in the series and if you're just discovering this challenge you can order an autographed copy from Tim here. One thing we are asked not to do is to share Tim's techniques however I can share my process and the products I used to create my Halloween themed canvas. Yes I know, it's a bit early for Halloween but it's what kept coming up in my mind so I just went with it. ;)


06.Header

You'll find the instructions on pg. 37 of CC3.


I gathered my supplies.

Base of my altered burlap panel.
(the 31 ephemera was later changed as well as the orientation of my canvas)

My colors of choice-seedless preserves, peeled paint and spiced marmalade.

I used ephemera (clock) by Tim Holtz and Graphic 45's Happy Haunting collection. The clock was distressed with Squeezed Lemonade and Wild Honey distress inks. I used a checkered border from G45 to build a frame for the focal image then die cut a On the Vine Spellbinders die to create my greenery and used Recollections flowers for a pop of color. The ribbon is held in place with an Ideo-ology buckle and two numbers from the Newsprint Alpha Parts which were altered with Peeled Paint distress paint. 

I used chitchat stickers to spell out my title.


This challenge is sponsored by
The Funkie Junkie Boutique
Linda's offering a $25 shopping spree to the lucky winner. 


Thanks for looking at my altered burlap panel, it was so much fun to create!

Hugs,
Lisa


Related Posts Plugin for WordPress, Blogger...