Monday, October 6, 2014

Playing with Pumpkins


Happy Fall Y'all!

Before I start my post I have a little confession, I've been busy lately with home improvement and "clearing the clutter" projects which hasn't left much time for blogging. Throw in a few trips and it has seriously cut down on my computer time. So if it's been a while since I paid you a visit please know that I'll be by soon and do a proper catch up. :)

Okay, I'm here to share an array of pumpkins treat boxes using templates and cutting files from The Cutting Cafe. Regina offers several fun ways to give sweet treats this Halloween and I have three to show you. For more pumpkin fun (3D cards, bingo cards, etc.) be sure to check out the DT lineup of projects on The Cutting Cafe blog tomorrow, October 7th.

First up is the Pumpkin Treat Box Template - Cutting File.
It includes 6 sentiments to print and die cut or punch. 
PUMPLIN

I added a punched MS border and some silver Stickles for fun then filled it with Reese's Peanut Butter Cups. Yum! 

*A little disclaimer here-I love Regina's sentiments and the fact that she gives you a TON of them with her designs. I used a stamped sentiment because I have so many stamps which have never been used and I feel guilty. Just wanted to explain why I didn't use one because I know inquiring minds will want to know. ;) 


Next is the Halloween Pillow Boxes Template - Cutting File.
Regina offer 4 window cutouts for the ultimate in cuteness. :) 
PILLOW BOXES

 Before I closed my box I tucked in a bag of Skittles for the recipient. It's guaranteed to put a smile on her face. :) I added ribbon and paper curls to the top of my pumpkin and orange peel Stickles for a little sparkle while a black soot distress marker defines the outline. The sentiment is another one in my stash that needed inking and a Spellbinders tag die and ribbon from my stash complete it. 

and

Last but not least is the Halloween - Fall Milk Carton Template - Cutting File.
It comes with 8 window cutouts to choose from.
HALLOWEEN

I used the pumpkin cutout because we're celebrating all things pumpkin at TCC and Authentique's-Glowing Halloween paper collection helped decorate it. A piece of acetate was adhered to the inside window and then I filled it with Reese's Pieces for a yummy treat.

The adorable owl tag is from the Halloween Mini Colored Set Printable Stamps.
HALLOWEEN MINI COLORED SET 1
There are 18 images in this set making it a fantastic bargain!


Each treat box/holder was distressed with black soot distress ink to give it that extra spooky feel. These are a great way to make treat giving fun this Halloween!!!

A quick reminder - if you do NOT own an electronic cutting tool you can use the PDF file which is included with every template/cutting file. Just print and cut with scissors!


Don't forget to check out the The Cutting Cafe blog on the 7th of October to see more inspiration by the design team and you could also win 3 free sets of your choice by leaving a comment for Regina. She'll announce the random winner on the 21st . 


Thanks for the visit today! Have a fantastic week. :) 

Lisa xx

Tuesday, September 30, 2014

Christmas Greetings


Hello and welcome!
Can you believe Christmas is right around the corner? It will be here before we know it and we want to help you get a jump start on your holiday card making but with a twist

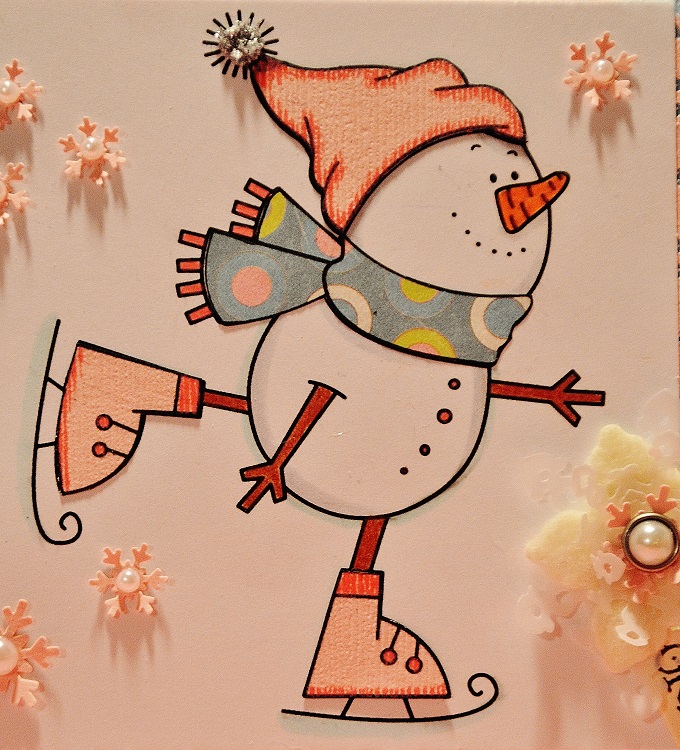
I'm the hostess for the new challenge at Top Tip Tuesday - Non Traditional Christmas - and we're asking you to create Christmas paper projects using non traditional colors or images. I created my card using Snowman Winter Christmas from our sponsor, Zlatoena's Designs at Etsy with  my non traditional colors of pink and baby blue. I turned the snow "man" into a snow "lady" by adding a pink paper pieced hat and ice skates and using a MME dp for her scarf. :) 

Here's my TIP-
When using a border punch that produces a negative image, save the images to use as embellishments. This is a great way to recycle!

A few close ups...

I added diamond flower soft to the pom pom on her hat and Prismacolor pencils were used to color her nose, arms, legs, buttons and fringes on the scarf. Kaisercraft pearls were added to the centers of each snowflake.

To create my layered snowflake I die cut two La La Land snowflakes with vellum paper and another snowflake was die cut from a Taylored Expressions die with cream colored felt. The MS corner punch produced the large pink snowflake and I anchored my layers with a MME pearl brad. The sentiment is from the Holiday Greetings set by Verve Stamps and was die cut from a tag set by TE. The velvet ribbon was in my stash and I tend to use it very sparingly. ;)

I love working with non traditional colors and I hope you will too!


Prize is 2 free digi's of winner's choice.

A big thank you to our sponsor for supplying the DT with images to create with!


If you like to mass produce your holiday cards be sure to visit the TTT challenge blog because Deneen has some great tips for you. Also, check out our two guest designers and their fabulous projects using Zlatoena's images. So happy to have both of you with us for this challenge! As usual you'll want to visit my teamies too and see their inspiration as well. :)


Thanks for the visit, have a wonderful day!
Lisa xx


Wednesday, September 24, 2014

Butterflies Galore


Welcome!

Well, as you can see, I went a little bit crazy with the butterflies on my September tag for Tim's 12 Tags of 2014. I couldn't help myself! I love butterflies and I love Tim's Butterfly Frenzy die. :) I followed along closely with Tim's tag and technique with one exception-I added a "charred" butterfly using Tim's effect powders so I could play along with the Compendium of Curiosities 3 Challenge #11. I needed this tag to "kill two birds with one stone" and I love how my charred butterfly looks as well as the pretty butterflies created with alcohol inks. 


A few close ups.

This tag reflects Tim's new spin on the Faded Layers technique which you can find on pg. 58 of Tim's newest Compendium of Curiosities book. 
Want an autographed copy? Click HERE
I used two shades each of red, yellow, orange, green, blue and purple alcohol inks to achieve my colors. I love the visual interest the text stamp adds. 

Challenge 11-Effect Powders-is the current challenge at Compendium of Curiosities 3.
  My butterfly was die cut from grunge paper and I used black soot embossing powder to achieve my charred look. 
Love it!
(Sorry, can't share the technique but you'll find it on pg. 52 of  CC3)


Following Tim's technique for the September tag I dabbed alcohol blending solution over the schoolhouse layering stencil on my glossy paper, run it through a puddle of citrus alcohol ink and let it dry. 
Here's a close up of the faded layers effect- 
I love the depth it adds!
The pretty lady is from Tim's Nature Walk set and was stamped with jet black archival ink. Per his instructions I added remnant rub ons from the Botanical set and matted my glossy paper to my black tag. 


The CC3C is sponsored by The Inspiration Emporium

iegc50


Challenges Entered:


Thanks for looking! Have a wonderful day!!
Lisa xx


Thursday, September 18, 2014

TCC's Stationery Caddy


Hello and Welcome!

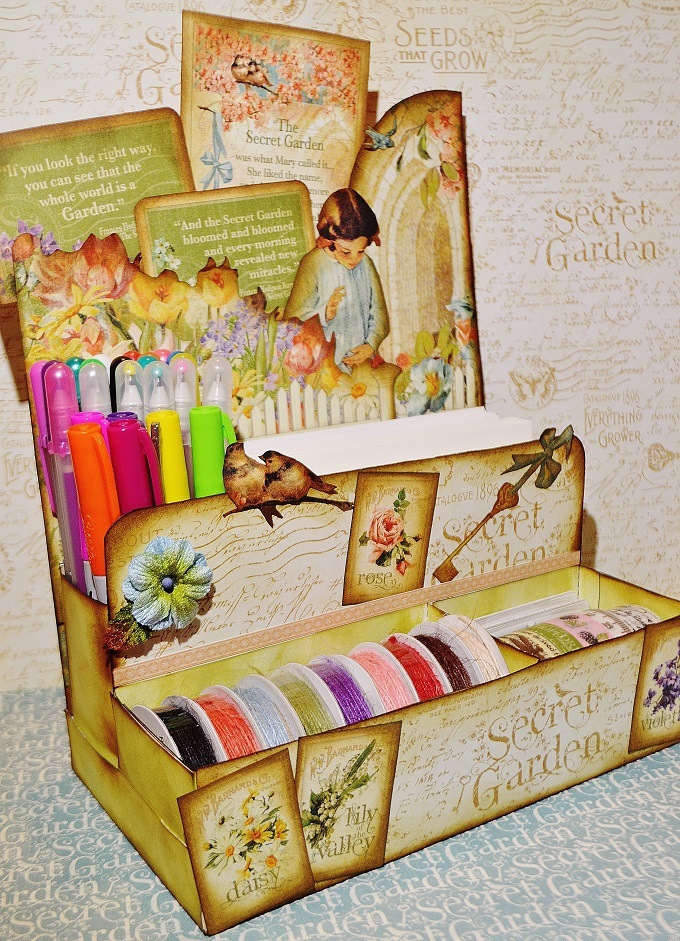
I'm excited to share my design team project for The Cutting Cafe with you today. Regina is the owner/designer behind TTC and she has designed a brilliant Stationery Caddy. This was a snap to put together and I loved decorating it with G45's Secret Garden paper collection. 

It's such a handy item to have in your craft/office space and personally I think it would make a great Christmas/birthday gift. For the crafters on your gift list you could fill it with crafting items (like I did below) or use it in your office to store easy to reach items. 

I stocked this caddy with gel pens, Sharpie pens, twine, washi tape and A2 size card bases in white and ivory. 

view from left side

view from right side

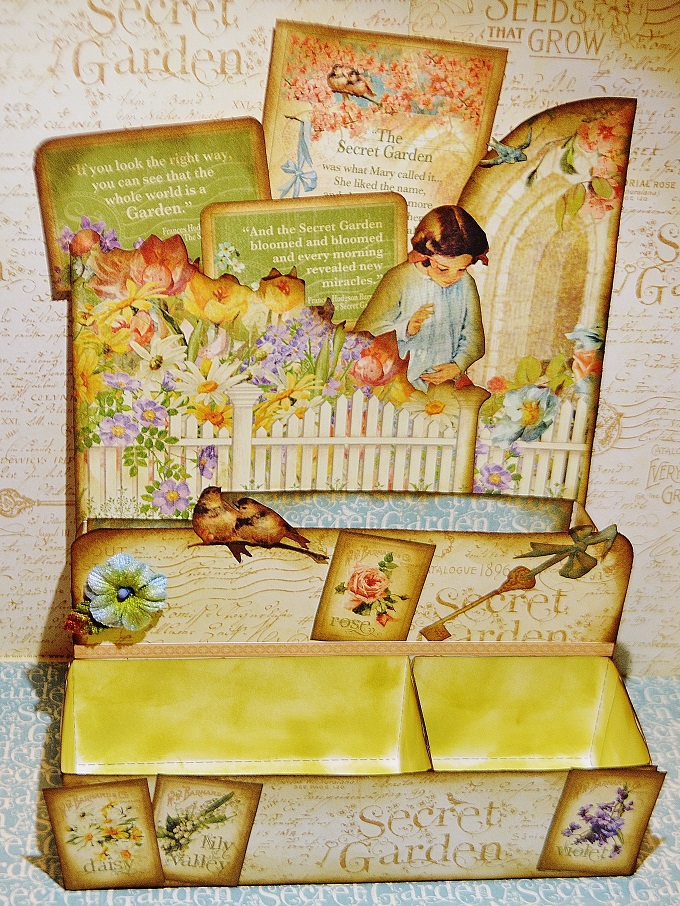
Here's how my caddy looked before I filled it.

I used shabby shutters and gathered twigs distress ink to distress the boxes and base. Then I chose neutral papers to cover the short and tall back panels and fussy cut images to add on my caddy. I added one blue Petaloo bloom and called it finished. 


The Cutting Cafe

The Stationery Caddy file includes:

The set comes with 2 different options of making the caddy.
Option 1 with 2 boxes in the front (like sample)
Option 2 with 3 smaller boxes in the front.
The back box also comes with an optional smaller inner box for holding pens and pencils or other like items.
The set comes also with 3 assorted backs in both tall and short sizes.
The file comes in the following formats: PDF, SVG, MTC and WPC.

Note: If you do NOT own an electronic cutting machine use the PDF file to print and cut with scissors. This file is easy to assemble so I encourage you to give it a try! 


Be sure to visit TCC's blog on Sunday, September 21st, to see more inspiration using this file and two other cutting files. 


Thanks for the visit today!
Hope everyone has a wonderful weekend. :)
Lisa xx

Tuesday, September 16, 2014

It's All About Kids


Hello and welcome! 
We have a brand new challenge for you at Top Tip Tuesday and it's Kids. We are looking for cards, LO's, or other paper crafting projects that feature kids or are for a kid. Our sponsor is 2 Cute Ink and I used Vampire Owl on my altered chipboard house by Crafty Secrets. It's been in my alterables stash for way too long and today it became a home. It's for my youngest kid and I think she's going to love it.  


I used papers from DCWV, stickers from Martha Stewart, a chipboard pumpkin by Graphic 45 and products by Ranger (distress ink-black soot and Stickles). 

The tombstone was part of the kit and I distressed it with black soot distress ink and embossing powder. The bone sticker is from a Halloween kit by Martha Stewart.


Halloween is definitely a holiday kids like because they get to dress up and go trick or treating (even if they are in college lol). 


Prize is 2 images of winners choice.

A big thank you to our sponsor for supplying the DT with images to create with!


For more inspiration please visit the blogs of my teamies to check out their amazing creations. 
Thanks for looking today and I'll be back soon with projects for The Cutting Cafe.

Lisa xx

Friday, September 12, 2014

Our World is a Beautiful One


Hi everyone! I'm back after a bit of a blog break to share my project for the Compendium of Curiosities 3 Challenge that ends in a few hours. Hopefully the "better late than never" rule applies here lol. The current challenge (can't believe it's #10 already) is to alter an assemblage clock and this is my version. It's heavily influenced by one I saw on Pinterest by the talented Irena Kowalczyk Rudlis and I used Graphic 45's beautiful Botanical Tea collection. 


Challenge #10
Header


While I can't share the technique I can share what I did to alter my clock.

I started by putting three coats of gesso on the clock then added color with distress paints and distress ink. I fussy cut images and added them inside as well as on the outside. I also added vintage lace and ribbon. 

The wood fence is by Kaisercraft and it received a light coat of gesso and was inked with gathered twigs distress ink. The last thing to do was to add three paper roses and my chitchat stickers which spell out my sentiment. With all of the turmoil going on in the world right now I needed to be reminded that this is a beautiful world I live in and that there's plenty of wonderful people out there.   


Tomorrow the CC3 crew will introduce Challenge #11 and if you haven't played along so far it would be a great time to jump in. It's so much fun! You do need your own copy of Compendium of Curiosities 3 to work from and if you want/need an autographed copy by Tim click here

This challenge is sponsored by The Funkie Junkie.

$25.00 gift certificate to the lucky winner


Have a wonderful weekend and I'll be back next week with my DT project for Top Tip Tuesday and more inspiration using the fabulous cutting files by The Cutting Cafe.
Thanks for looking!

Lisa xx

Tuesday, September 2, 2014

The Great Gatsby

Front Cover

Welcome!
I'm happy to be back to share my DT project for our new challenge at Top Tip Tuesday which is

**Stationery**
(ie office stationery)

Not sure that this is office stationery per say but it was a special request from my DD and I couldn't resist altering this composition book for her. She's a huge fan of the movie, and book, The Great Gatsby. I began the alteration process by painting the edges with acrylic paint. I chose four images (which I Google'd) and imported each into Word then sized to fit my cover. 


(inside front cover)
Had to include these lyrics by Lana Del Rey.

(inside back cover)
This is a character map and I love it.

Back Cover
The beautiful blue (lapis) heavy body paint is by Dina Wakley.


Prize is 4 digital images.


Thanks for looking! For more inspiration be sure to visit my teamies blogs and check out their creations. 

Have a wonderful day,
Lisa xx

Related Posts Plugin for WordPress, Blogger...