Showing posts with label Taylored Expressions stamps. Show all posts

Wednesday, March 1, 2017

E, F and G at ABC Christmas Challenge


We have a brand new challenge at ABC Christmas Challenge that runs the entire month of March. We are on the letters E, F and G and you have the choice to play along with all three letters or combine them as I did on my card. 

E is for Edge
F is for Family
G is for Girl


Sponsors


Prize is a gift certificate to their online store.


Helen is hosting this challenge and she is also offering a prize. 

Set of Sizzix Dies


My edge is snowbanks created from a My Favorite Things die and my family is from the Taylored Expressions stamp set-Penguin Pals.


I colored my background with distress inks and added my heavy snowfall scene by diluting gesso with water then splattering with a paintbrush. The images were stamped with black Archival ink then colored with my new Faber-Castell Polychromos Pencils which were gifted to me by my dear friend, Katrin. It is my first experience coloring with them and they're awesome! Thank you for sharing those with me sweetie. :) I love snowy scenes and I created some dimension between my snowbanks with Scotch foam tape. For a little sparkle I added glitter and subtle shading was applied with Copic markers. 


We look forward to seeing your creations. To see more inspiration for our E, F and G challenge visit the link above and check out what my design team mates created. 

Before I close today I'd like to share that on the 22nd of February my mother went home to be with the Lord. I will miss her but I am grateful that her battle with Alzheimer's on this earth is over. It is a disease I would not wish on anyone. I pray for those who suffer with this disease and for the families affected by it. May God bless and comfort each of you!

Thank you for your visit today, it means a lot. 
Lisa xx 


Wednesday, December 9, 2015

Y - Youngsters


Y - Youngsters

That's our new challenge at ABC Christmas Challenge

It's so hard to believe this year is nearly over and the next challenge is the caboose of the alphabet - Z. For me it's the youngsters (of all ages) that make Christmas special. I once thought, a long time ago, that I never wanted to marry and that I didn't want children. I can't tell you how happy I am that things did not work out that way. My life without my children wouldn't be worth living. When my son married in 2012 I inherited another youngster, my daughter-in-law, and this easel style card is for her. 

Inside

She's a huge fan of Disney's Frozen so when I came across this paper, Webster's Pages Winter Fairy Tales, I immediately thought of the movie. Olaf is a cutie I admit however we weren't thrilled when we visited Disney's Epcot Center this past January and learned that the Norway ride exhibit was shut down and being replaced with a Frozen themed ride. Not cool! To say that this movie has had a huge influence on the Disney's Parks is an understatement. It was Frozen hysteria I tell ya. 


I did find the Frozen look of Cinderella's castle to be absolutely magical though. 
Thanks Elsa!

Magic Kingdom, January 2015
Orlando, Florida


The colors kept changing and like a youngster I was totally mesmerized by the lights. And now you know my favorite thing to do at Christmas...looking at Christmas lights. On the flip side my pet peeve is people who are still lighting their home after New Year's. ;) 


Our challenge is being sponsored by 

Photobucket
Prize for our lucky winner is a $10 Gift Certificate


For more inspiration visit the challenge blog to see what the rest of the DT created.

I hope your holiday season is off to a good start. So far so good for me but there's a lot of wrapping yet to do so I'd better get busy. Have a great day, wherever you are!
Lisa xx

Tuesday, December 1, 2015

9 Days of Christmas Pocket Letter


12  9 Days of Christmas!

We're all familiar with the song - 12 Days of Christmas - but when you're making a pocket letter there are only 9 pockets therefore in the world of Pocket Letter Pals it's now known as the 9 Days of Christmas. :) Using the same concept in the song we were asked to fill the back of each pocket with 1 of something, 2, 3, 4, ... you get the idea. Such fun!

Here are a few closeups plus the 9 Days of Christmas goody pockets.
{click on image for better viewing}
Top Row-I started by using two dp's by Bo Bunny and mixing elements from both. On the middle pocket I stamped a sentiment by TE's Sparkle and Cheer stamp set. A 3D Greetings sticker was added to the first pocket and the ornaments on the 3rd pocket were enhanced with Stickles glitter glue. Plastic numbers were altered with Adirondack paint dabbers and glued to the front of each pocket.

Rows 2 and 3 are shown together so you can see how I used the dp to my advantage. I fussy cut the mantle and stockings and added them as well as the saying on the bottom right pocket. Presents were fussy cut from a coordinating Bo Bunny dp and popped up for dimension with Scrapbook Adhesives foam squares. Candy Cane Stickles were applied over the ribbon on the tree for sparkle and I used scrap pearls from a large bling swirl for ornaments. Copper Stickles outline the star on top of the tree and I also added Stickles to the stockings so they'd sparkle to. 

I added Heidi's Marquee tape and blue ribbons to the spine. I'm so happy my pal, Ginger, loves her PL! Can't wait for hers to arrive. :)


Now let's check out those goodies....
I sent my pal...

1 piece of candy
2 Christmas brads
3 burlap bows
4 Melissa Frances candy canes
5 washi tape samples
6 Christmas clothes pins
7 felt snowflakes
8 light bulb stickers
9 Christmas tags

and a partridge in a pear tree........


I told you it was fun! I am loving the Pocket Letter Pal community and it has been such a wonderful experience. While I have more Christmas PL's to share with you I thought I'd sneak in a Smaller Pocket Letter tomorrow with a shabby chic vibe to it. 

I'm off to pack up Thanksgiving decorations (that's what happens when you travel for the holiday) and begin my Christmas decorating today. 
There's so much to do!!! I need an elf to help me get it all done. :(
Missing my girl!
Lisa xx


Monday, November 30, 2015

Goodbye November


That's right! 
It's the last day of November and tomorrow begins the official countdown to Christmas. I thought I'd quickly share my final Fall / Thanksgiving Pocket Letter this year with you. As a member of Pocket Letter Pals I belong to several Groups in which monthly themes are established. In the Anything and Everything Group the theme was Turkey Day and this letter went to a fellow Tennessee gal.

Some closeups...

I used the Hello Journal Card from The Cutting Cafe's Pocket Letter Pals Printable Set. The top row features a leaf print resist paper by HOTP, cardstock word stickers and amber colored bling. The second row outer pockets are green corrugated paper from the Neutrals corrugated 6x6 paper pad by DCWV. I added cardstock and clear stickers, a stamped sentiment (TE) and trio of pumpkins (Verve) -which I colored with Copic's and highlighted with orange peel Stickles- and spelled out a message to my pal with Tim's chit chat alpha stickers.

On the bottom row I used a turkey stamp (Verve) for the middle pocket, colored him with Copic's and highlighted with copper Stickles. A clear "Gobble Gobble" sticker was placed on top of the pocket for fun. The far right pocket has a band of corrugated paper with twine and a stamped sentiment (TE). The far left pocket has a cardstock sticker, two feathers and a hand cut fish tail from scrap corrugated paper. If you look close enough you'll see the renegade exclamation point (which went after pal on the above middle pocket) that somehow ended up there. Luckily I caught it before it was mailed.

I added washi tape to the spine, three brown satin bows and 3 bronze leaf brads.

I filled the back of the pocket letter with goodies (ribbon, washi tape, ephemera, burlap bows, fall buttons, clothes pins, family recipe, a note from me and printed leaves) my pal can use for future Fall / Thanksgiving pocket letters. Also you can see on the middle pockets (1st and 2nd row) more journal cards from the Pocket Letter Pals Printable Set. They are actually from the Hello My Name Is Journal Cards Printable Set and as you can see there are several designs in this set. Perfect for a Pocket Letter Pal to use. :)


I'd be remiss if I didn't share my pal's pocket letter as well. I love it!!!
Thanks Leesa! :)
I adore the vintage images she used and the way she rounded the corners off each ATC as well. Such a lovely Thanksgiving pocket letter and the goodies were wonderful too. As it turns out she doesn't live that far from where I live (in Tennessee) and she's also visited the lake I live by so that was kinda cool. Love meeting a fellow Tennessean through Pocket Letter Pals. I know we'll be swap partners again!


Tomorrow I'll be back (that's right, in fact I'll have a blog post every day this week) with a Christmas pocket letter to officially kick off the most wonderful time of the year.

Have an awesome day, wherever you are.
Lisa xx


Sunday, March 3, 2013

Make It Monday #130 with Saturated Canary

Sentiment and image on die cut by TE

Did you hear the news? We have a new design team member and I hope all of you will give Jenny a warm Make It Monday welcome. Every DT Call entry was fab and I know it was hard for Michelle to choose only one but we are delighted to have Jenny on board with us. She designed a delightful card using our current sponsor that you will not want to miss. 
Welcome Jenny!!! 


The linky party at Make It Monday is now open and we want to see your papercrafting projects, old or new, in our gallery. That's right, your creation does not have to be new so look through those oldies but goodies and share them with us. Our sponsor this week is Saturated Canary and I'm using Usherette on my card. We are big movie buffs at my house so I'll use this card to ask my DH for a date night when the youngest leaves the nest in August. ;) For those of you who love working with digital images you know how much fun it is to color Krista's images. I love the eyes on her girls and the expression behind them!


I switched gears for the inside of my card and used a stamp and sentiment from TE's Cuppie Love Scenes which is too funny. I needed to continue my movie theme but found that I need stamps in that category. It's one more stamp set that I can check off my stamp count list (see top left sidebar) though so I'm happy. Be sure to click the photo to see the mad cupcake on the right, a little perturbed ya think lol?!?

 
Sponsor


Prize:
Krista is generously offering
2 Digis
to our winning commenter.
 
Remember, to be in the running to win the prize from our sponsor this week just leave a comment for another entry. Be sure to mention you saw them on Make It Monday. The more entries you comment on the more chances you have of winning!


Pick of the Week is...


I love everything about this card! This is one of my fave color combinations and Pat's stitching is amazing. The touch of gingham, wonderful image and sentiment complete this sweet card. Click her link to see more photos and leave some comment love. Thanks Pat for sharing your talent with us at Make It Monday!


and my second Pick of the Week is...


#21 Blackdragon


I could not resist choosing this as my second entry being that I'm a huge Alice in Wonderland fan. My daughter is too and she'll go mad :) when she sees this project.  Please click Blackdragon's link to see more photos of this ingenious creation and the challenge that inspired her to make it. (I'm sure she won't mind if you leave her some comment love too!) Thanks for sharing your talent with us at Make It Monday!


For more inspiration visit my teamies by clicking HERE to go to the challenge blog or you'll find their links on my right sidebar. A big thank you goes to Krista Smith, creative talent behind SC, for supplying the DT with beautiful images to create with. It's your turn now and we can't wait to see your gorgeous paper creations!


Hugs and Happy Crafting,

Lisa xx

Wednesday, August 1, 2012

You Are Such a Joy to Me


I'm back to play along with the current CR84FN #59 color challenge  and I'm fashionably late. The story of my life these days. :( Anyway, I did not want to pass up the chance to play with this  awesome trio of colors-coral, brown and tan. It's such a rich palette that I opted for simplicity on this card. I let the beautiful dp {with a Sonnet by William Shakespeare} do most of the work but I did stamp a floral scroll image to highlight part of the text. Keeping things truly simple I accented with a wood die cut butterfly that I inked with coral rose chalk ink. A coral dp backs my sonnet page and there's coral in the glittered butterfly on the page in the lower left corner. I created my own dp by using a roller script stamp inked with Rich Cocoa and randomly stamping over a tan piece of cardstock. You see brown again in the crochet trim and trio of pearls on opposite corners.


Because the dp was so pretty and there was text all over it I did not want to stamp my sentiment on the front but chose to do so on the inside. I backed it with a lacey oval die cut out of the same coral dp on the front and fussy cut a butterfly from a coordinating dp from the same paper pack. I'm not going to sign the card but instead I plan to include a handwritten note sharing why this special person is such a joy to me. Also, I did something a little different here-I stamped the sentiment first in a light coral ink then came back and stamped over it in a darker shade giving it a slight shadow effect. It doesn't always work but I'm okay with how it turned out this time. You do have to be careful and it works better with clear stamps because you can see where you are inking. No offense to rubber or wood stamps. ;)


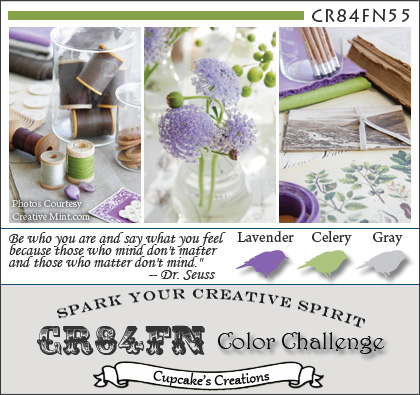
I'm also playing along with Just Us Girls-Inspiration Challenge #147 and linking up with the weekly linky party at Make It Monday #100 w Scrapbook Sisters where they are celebrating their 100th challenge. Yay! A big thank you to the design teams at each of the challenges for providing weekly inspiration and making it fun to papercraft. :) Here's a look at the beautiful CR84FN color challenge inspiration photo.


and the inspiration photo from Just Us Girls.


Hope I did not ramble too much, my brain is on true overload right now. Thanks for dropping by my crafty spot!
Hugs,
Lisa

Stamp: Vintage Dreamer (TE)
Ink: Memento Rich Cocoa, Rose Coral & Blush Rose chalk ink (Color Box petal point)
Paper: the Maripost stack by DCWV, cs
Accessories: butterfly wood die cut (Studio Calico); chocolate & champagne pearls (Kaisercraft); brown crochet trim & ivory trim (Hobby Lobby); Spellbinders Cl. Ovals Lg. & Lacey Ovals

Saturday, June 9, 2012

Sweet Serendipity


Hi there, I'm dropping in to post this card I made this afternoon while taking a break from the heat. I love the colors of the CR84FN55 Color Challenge so much that I wanted to make another card using the fabulous challenge colors. While searching for a sketch I happened upon a challenge {serendipity part} that I couldn't pass up. One of my goals this year was to try new techniques and thanks to the current Just Us Girls Challenge (JUGS) I can check the Acrylic Distress Technique off my list. In their challenge post they've included a link to Beate's tutorial at SCS and I hope you'll check it out. With the colors and the technique down I searched for a sketch and the current Retro Sketches #15 was perfect. I rotated the sketch and I added an inset panel to my base so my ribbon would tuck neatly underneath, otherwise I remained true to the sketch by the uber talented Laurie. 


On a quick note I stamped my image onto vellum, let it dry and die cut it. I die cut two more pieces of white cs, one to back the image and another for my embossed panel. You can see how I did the technique if you visit the JUGS link and I inked the edges of the inset panel with celery just to make it stand out. A polka dot ribbon brings lavender into play in a fun way and my brads finish it off.

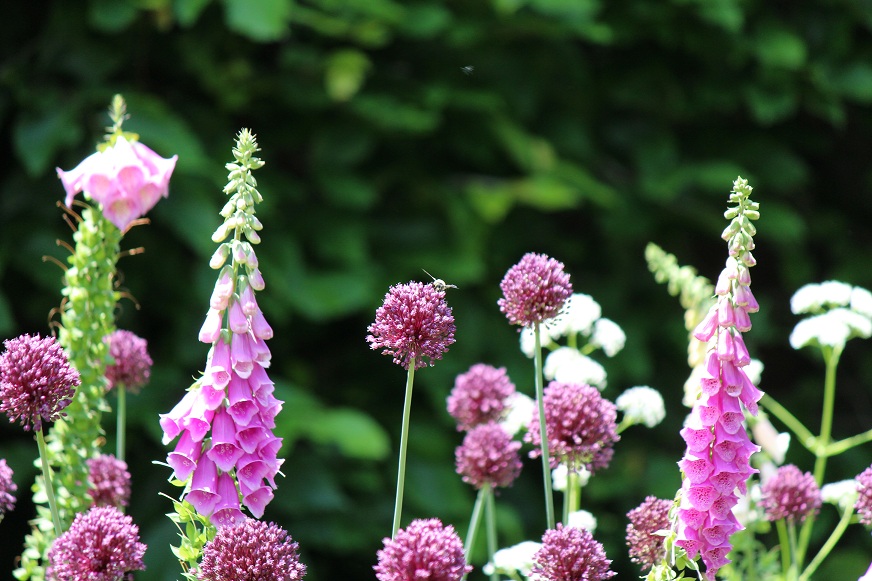
I'll admit that I wanted another chance to work with the CR84FN colors because last month we traveled to beautiful Colonial Historic Williamsburg and I fell in love with the gardens there. One in particular, the Governor's Palace Gardens, was absolutely breathtaking. I could not resist coming back for a second look the next day and this time I brought along my macro lens. Here's a photo, or two, from that garden. Can you see the bee in the first one?


There was beauty everywhere that I'd love to share but this post is already photo heavy. Thanks for taking a look and hope the rest of your weekend is awesome! BTW, the color challenge ends today so hurry if you want to play along. Edited for correction: I missed my second entry in the color challenge because the collection closed last night but it still inspired me to make this card and I love it. The other two challenges have plenty of time so good luck. :)
~Lisa

Supplies:
Stamps: Discover Your Wings (TE)
Ink: Hyacinth, Heliotrope & Split Pea (Versa Color/Tsukineko Co.), Peeled Paint Distress Ink (T!m Holtz/Ranger)
Paper: Avalanche White cs (Bazzill Basics), vellum
Accessories: Spellbinders Labels Eight & Twenty Dies; Victoria Embossed Folder (C'bug); lavender polka dot ribbon (TE); brads (American Crafts); Silver Metallic Acrylic Paint Dabber (Ranger); 3D Foam Dots (Therm O Web); sandpaper

Thursday, June 7, 2012

Happy 90th Birthday!


Hello and welcome! I have a birthday card to share today that I made for my FIL who will turn 90 on June 20th. Now that's cause for a celebration, right! I thought the colors of the Play Date Cafe Color Challenge 135 were perfect for a masculine card and the Deconstructed Sketch No. 55 was fun to work with. Last but not least I'm entering this in the Make It Monday #92 Challenge & the Ribbon Carousel Blog #56 Challenge. I have to say that I'd never have put these colors together on my own but the inspiration photo convinced me too {I'm glad it did}.


Since this is a very special birthday I wanted to personalize it so I used two different date stamps to record the year of his birth and his current birthday. I improvised with the sketch by adding ribbon at the bottom and a button & hemp bow. I somehow end up making masculine cards in the CAS style which is hard for me because I always want to add more, lol. I added texture by embossing a pool colored cardstock panel and rubbed Potter's Clay ink randomly over the front. The sentiment panel was cut from an aquamarine dp and I used the same color for the rhinestones on my die cut fishtail banners. Hopefully I tied everything together with clay as my third challenge color!

On a personal note, I promised in my last post to share my golden egg story with my regular visitors so here goes. When I was in 3rd grade my school hosted an Easter Egg Hunt and the grand prize was 'a golden egg'. This particular egg had candy, prizes & money inside but it was the golden exterior that I was after. I don't know why I was obsessed with it but I wanted to be the first to find it and win that egg. Obviously I didn't but a classmate named Lydia did and while I was happy for her I was sad for me. {So silly, I know} My DH & DD were shopping in early April and they spotted a Godiva chocolate egg wrapped in gold foil. They bought it & gave it to me Easter morning, which I thought was so sweet. Finally, after 40 yrs. of waiting I had my golden egg. Only, a greedy little mouse who loves chocolate ripped into it this past Monday night at 1:52am. How do I know this? He climbed up the secretary, which is beside my bed, and was on the desk shredding the foil. Very loudly I might add! :( It woke me up and that started a 2.5 hour unsuccessful mouse chase. My DH set out to trap him the next night but he got away with the chocolaty goods which really infuriated both of us. Yesterday when he came home from work he put his engineering skills to work and created the 'super' mouse trap. At 11:36pm last night that mouse learned a hard lesson in stealing. He's the second uninvited mouse we've had in 13 yrs. and I hope he is the last. As for the egg, it's in the garbage and the moral of the story is this-if I were meant to find that egg in 3rd grade I would have but I didn't. Life goes on! Hopefully you skipped this paragraph but if you didn't please accept my apologies. :-)
Have a great weekend!
Lisa

Supplies:
Stamps: Essential Messages (Hero Arts), You're My Type -Lower & # (TE)
Ink: Memento Potter's Clay
Paper: aquamarine dp-Laced With Grace (Glitz), graph dp-Fly A Kite (October Afternoon), pool & yam cs (Bazzill Basics)
Accessories: fishtale banners-Lacey Pennants dies (Spellbinders); Circles-Texture Fades (Sizzix); Date SMASH stamp (K& Co.) and We R Memories magnetic date stamp; ribbon & button (TE); aquamarine rhinestones (Kaisercraft); clay colored hemp cord

Thursday, December 22, 2011

Merry Christmas to all...


Hi there, I'm here to share a quick and easy way to make a holiday organizer using stamps by Taylored Expressions and a store bought journal. Now I realize I should have posted this earlier but if nothing else perhaps you can pick one up after Christmas to use next year. ;) The journals I bought are illustrated by Mary Engelbreit and I added stickles and fun embellishments to personalize each one. I created sections by using the Keeping Tabs stamp set and then I stamped "Planner" on mine and "Christmas Planner" on my dd's from the Take Note Holidays stamp set. This was a fun & inexpensive project as the journals were a dollar each at Michael's (which makes for a great teacher's gift or pre-holiday gift for friends and family).

Here is my dd's planner which has been heavily used (you can see the wear & tear) as she has been promoted to Chief Elf. Yes, sadly my kids are too old for Santa to visit anymore, we miss his visits, but to stay in the spirit of things they've taken turns making the gift lists, shopping, wrapping presents and distributing them on Christmas morning. This way they still get to experience the magic of Christmas. :-)


This is probably my last post before Christmas Day and I want to wish each of my blog visitors, and U. S. Armed Forces around the world, a very Merry Christmas!!!
God Bless,
Lisa

Stamps: Keeping Tabs & Take Note - Holidays (Taylored Expressions)
Ink: Memento Tuxedo Black, Ladybug, Bahama Blue & Cottage Ivy
Paper: white cardstock
Accessories: Keeping Tabs die (Taylored Expressions); Journals (Mary Engelbreit Ink); (Spellbinders Labels Ten die; Flower Woolies (Basic Grey); red epoxy frame (Creative Memories); red pearls (Kaisercraft); red rhinestones (PS); Black Diamond, Christmas Red, Yellow, Stardust, Green, True Blue Stickles and Glossy Accents (Ranger)

Friday, December 16, 2011

October


Hello to everyone and welcome! I don't know about you but this has been a very long week and I'm ready for the weekend. My weekend is centered around finishing my Christmas shopping and baking. The dd and I plan to make our homemade candy trays & cookies and we may even bake a chocolate cake just because we're in the mood for one. :-) It has been awhile and we love Ina Garten's (a.k.a. Barefoot Contessa) Beatty's Chocolate Cake, YUM-O!


Now for the October deets. I used dp's from Echo Park's the Apothecary Emporium collection and the stamps are from Toil & Trouble and You're My Type-Upper by Taylored Expressions. All of the stamped images were colored with Copic markers and the mirror/picture frame has a touch of Smooch on it while I used Stickles on the spider's web and witch's hat for a little pizzazz. I did a lot of fussy cutting but it was worth it. I pulled out my Pennant Border die (which I do not use nearly enough!) and die cut a border in black while punching 1/2" circles for my stamped alpha's. The black crow also received a Smooch "eye" and a touch-up on his feathers. Again I used Taylor's 2012 Mini-Dated Calendar download and framed it with a border of liquid pearls against a black backdrop. Ribbon and Copic colored rhinestones finish it off. The cute little witch in the frame is my dd and since October is her birth month I chose to feature her, at age three, in her Halloween outfit. This was such a FUN page and I can't wait to show you September which is my ds's birth month. :-)


Have a great weekend and just in case you're craving a little chocolate here's a link to Ina's awesome cake. I use Ghiradelli semi-sweet chocolate bars which are easier to find and less expensive but just as good. Another quick tip, crush the powdered coffee with the back of a spoon until it is finely ground. Enjoy!
~Lisa

Stamps: Toil & Trouble & You're My Type-Upper (Taylored Expressions)
Paper: the Apothecary Emporium (Echo Park), Choice Snow White (TE store), cs
Ink: Memento's Tuxedo Black
Accessories: Pennant Border Die & Mini-Dated 2012 Calendar Download (Taylored Expressions); 1/2 " circle punch (EK Success); Orange Peel & Silver Stickles/Silver Pearl Liquid Pearls (Ranger); Tuxedo & Silver Fox Smooch (Clearsnap); black cording & string from stash; orange polka dot ribbon (Hobby Lobby); Copic markers; clear rhinestones (PS); 3D foam dots (Therm-O-Web) 


Saturday, December 10, 2011

Fa la la la la


I'm making a quick stop here to post another fun holiday card featuring the cutest cupcake ever, Cuppie. It's a busy shopping day for me so I'll make this short and sweet.

For today's card I used stamped images from Home Sweet Home by Taylored Expressions and dp's from Holly Jolly Christmas by Echo Park. I ran into a wonderful sale at Jo-Ann's a few weeks ago and picked up a Susan Winget Glad Tidings Toys & Presents Chip Box and pulled two glittered chip snowflakes out to use on this card. A Spellbinders Large Classic Inverted Scalloped Circles die in pink cardstock helps to frame out the main stamped image and Cuppie was stamped onto TE's Choice Snow White in Memento Tuxedo Black ink. A few Rouge Liquid Pearls by Ranger finish it off and I stamped the Fa la la la la in the upper right corner also in Memento Tuxedo Black ink. Two hot pink brads complete the embellishments and Cuppie was colored with various Copic markers.

I'm off to start my day and I hope all of you have a wonderful day wherever you are! Thanks for stopping by and I always enjoy your sweet comments. ;)
~Lisa

Stamps: Home Sweet Home (TE)

Wednesday, December 7, 2011

Debuting February and July in my altered world...


Hello all! I'm back today with two calendars from my calendar/scrapbook altered project that I am working on. Life has been hectic lately but I am determined to finish these!! I'll be back later in the week to feature some that have scrapbooking as part of the page element, promise. Today's post is all about February and July and I needed a little inspiration when I began the month of February. I paid the Verve gallery a visit and  spotted a heart on a scrapped page, by Julee Tilman, which I CASE'd because I loved it and the sentiment. You can spot it in the Hundred Hearts gallery at http://www.verve.com/ if you'd like to see it for yourself. Everything else on both calendars is original and these were quick and fun to make. Hope you enjoy!


It's another cold and rainy day (check, just started snowing) here and I certainly hope your weather is better than ours. Thanks for stopping by and I'd like to welcome Lucia from Rome who is a private follower. I really appreciated your sweet comment and enjoyed checking out your blog. You are definitely a creative spirit Lucia and I can't wait to see more inspiration from FondoBlu Cards. :-)

Happy Crafting Everyone,
~Lisa

February Calendar:
Stamps: Hundred Hearts & Hearts on Fire (Verve)
Ink: Memento Tuxedo Black
Paper: Be Mine (Echo Park), Choice Snow White (TE store), cardstock
Accessories: Mini-Dated 2012 Calendar Download (TE); Heart Punch (Emagination); Rhinestone Swirls (Zva Creative); Plaquettes-14 (T!m Holtz/idea-ology); Black Diamond Stickles & Rouge Liquid Pearls (Ranger); Copic Markers; Hot Pink Brads & Pink Rhinestone Heart (PS)

July Calendar:
Stamps: 4th of July Wreath (Taylored Expressions)
Ink: Red Pigment Ink Pad (Stampabilities), Memento Tuxedo Black
Paper: Blossom Soup (Jillibean Soup), Choice Snow White (TE), cardstock
Accessories: 6x6 2012 Calendar Download (TE); Seasonal Wreath Die (TE); Copic Markers; Red Plaid Ribbon & Red Burlap String (May Arts); Red Atyou Spica Pen (Too Marker Products, Inc.); Blue Star Button from stash
Related Posts Plugin for WordPress, Blogger...