Thursday, September 10, 2015

Fall Mixed Media Canvas


Fall is nearly here and personally I couldn't be happier! I decided to celebrate by creating a mixed media fall canvas that features the 3-D Pumpkin Template...Cutting File by The Cutting Cafe. While this template creates the cutest 3-D pumpkin for holiday decorating, I used it as a template for my fall canvas. It's a huge time saver and frankly I don't have much experience drawing pumpkins lol. 

I have a complete step by step Snapguide tutorial to share with you below. The steps can be used to create any themed canvas you like. I hope you enjoy it. 


To view all of the wonderful templates and cutting files visit The Cutting Cafe. It's not necessary to own an electronic cutting machine as Regina offers each cutting file in a PDF as well. 

I'm off to fix a quick pasta dinner for one. My hubby is fishing with a friend and it's just me and my fur baby here tonight. Think I'll watch my favorite chick flick - Under the Tuscan Sun.

Ciao!
Lisa xx

Tuesday, September 8, 2015

Say Hello to Lucy


Hello and Welcome!

Hope everyone here in the US had a wonderful Labor Day holiday. Ours was busy but we had a great time visiting with our kids and furry grand babies. :)

As I mentioned in my previous blog post I'm sharing something new here on my blog. I discovered Tamara LaPorte's blog - www.willowing.org  - earlier in the spring and fell in love with her whimsical mixed media art. After watching her FREE 4 Week E-Course titled Art, Heart and Healing I was inspired to do something I haven't done in a long time...draw. This is one of Tam's mixed media girls from the class and I named her Lucy. It's a little intimidating sharing your art with others and for the past several months I've kept it a secret. Today I'm choosing to step out and share the girls I've been creating in my art journals. Over the months I branched out and you'll be able to see that progression weekly here on my blog. 


"Inspiration does exist, but it must find you working."
                                                     -Picasso


Lucy is an independent spirit whose destined to blaze her own trail. 
Hence the quote below by Dr. Seuss.

I typed up the quote using Adler font, cut the word strips out and used a black gel pen to scribble a border around each one. Liquitex Gloss Gel was lightly brushed on the back and they were glued in place.

Whimsical people/creatures share three traits-

big heads
small bodies
overly emphasized features

and I just love them!


I'll be back later in the week with a Snapguide tutorial featuring a fall cutting file from The Cutting Cafe. Thanks for looking today!

Lisa xx


Friday, September 4, 2015

Sweet Gifts


Happy Friday everyone! 
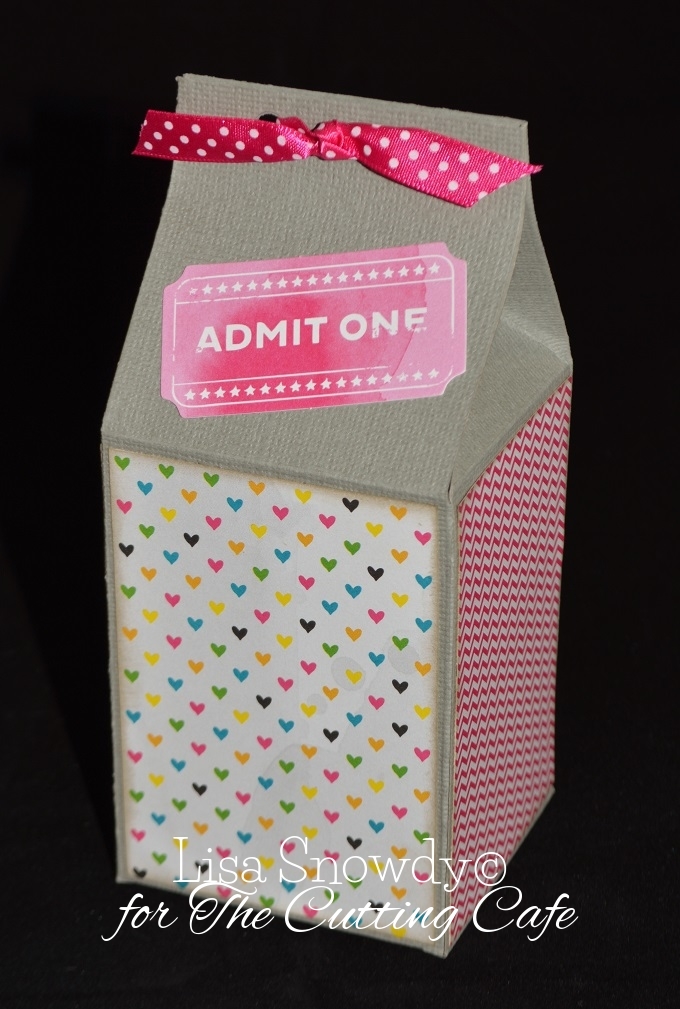
As promised I'm back with my design team project for The Cutting Cafe. Regina asked us to showcase her adorable milk carton templates...cutting files and I was happy to. We have several birthday's coming up in our family and these make great packaging for gift giving. They also make great party favors and they're super fun to decorate. Can't you see one all dressed up for Halloween or Christmas and filled with candy! Click here to see the pumpkin milk carton I created last fall.

As I mentioned in my previous blog post I am introducing something new here at Adventures in Paperland. I am now offering Snapguide tutorials for my design team projects as well as other creations I want to share. You'll be able to see how easy it is to create with Regina's templates and cutting files. It also gives me an opportunity to share some tips and tricks along the way. 


The Cutting Cafe


Here's a second milk carton I put together using the same steps in the tutorial. The only changes were the Pumice Stone Distress Ink I used to distress the paper edges and I chose two different designer papers from the same collection. 


Before I go, I want to wish my fellow Americans a happy and safe Labor Day weekend. We're off to visit our kids and enjoy some time with them. It's cool having grown up children and totally okay to be an empty nester. Course, I wouldn't have said that two years ago. ;)

I'll be back on Tuesday with another "new" for me. In the meantime you can click on any of my social media pins to connect with me.

Take care,
Lisa xx


Monday, August 31, 2015

Art Journal Play


My poor blog has been neglected the past few weeks with moving my daughter to another apartment and taking a family vacation to Branson. We certainly did not know we'd be moving her when the trip was planned but it provided a nice break from all the packing. Thankfully she's in a better place with huge closets (girls love those), more living space, a fantastic outdoor space for our grand dog to play, and less noisy neighbors. :)

After recovering a few days, yes I needed to recover, I went downstairs to my crafty room and played in my large Dylusions journal. There was no plan in place and I started by spraying some of my favorite colors on the page using Dylusions and Mister Huey ink sprays. I always use Dyan's trick of rolling a paper towel roll over the pages to soak up the excess ink. Don't throw them away because you can use them in your art, if not on your current project then another one perhaps. 


I added strips of drywall tape and random stamps by Tim Holtz in various places. The stars were stenciled with a Dylusions stencil and Archival Leaf Green permanent ink. To shade them I used a black Stabilo pencil and went over the lines with a paint brush dipped lightly in water for a deeper effect. Stamping the letters with a speckled dot stamp (by Tim) helps them pop a bit. 


This song popped in my head and I decided to spell it out with alpha stickers and foam thickers for dimension. I love how Finn's Dots and Stripes stencil and Modeling Paste adds great background texture. Because I love circles I added a few using gesso and a cap from one of the nearby products I was using. That's a trick I learned from Kate Crane, thanks Kate!


I'll be back on Friday with my design team project for The Cutting Cafe and in case you haven't heard yet there's something new coming to Adventures in Paperland. Don't miss it!

Have an awesome day, wherever you are!
Lisa xx


Thursday, August 13, 2015

The Final Challenge at CC3C


The final challenge, Layering Stencil: Monoprint, bring us to the last technique in Tim Holtz's Compendium of Curiosities 3 book. It makes me sad to say goodbye to the challenges but I know that I'll keep up with the Curiosity  Crew through their blogs and on FB. They have provided amazing inspiration each challenge and I just want to say a big thank you.  Also to Linda Ledbetter for hosting all 34 challenges, now that's commitment!

34.header

It's not too late to get your autographed copy of Tim's Compendium of Curiosities 3 book on his blog. 


For my last project I decided on a tag because Tim seems kinda fond of 'em. ;)

A little close up of the Layering Stencil: Monoprint technique using Tim's Honeycomb stencil. In the upper left corner I stamped a quote, from the Classics #16 set, which fits perfectly with my final entry. 

 I had to use this gorgeous butterfly from the Limitations set. It was water colored with Distress Markers-seedless preserves, mowed lawn, squeezed lemonade, mustard see, broken china, spiced marmalade- and received a dusting of Clear Rock Candy Distress Glitter for some texture.

(Voyage stamp is from the Classics #1 set)
I have enjoyed every minute of my artful voyage with the Curiosity Crew.
Thanks Ladies!!!


Wonder when book #4 will be published? Can't wait!!


The final challenge is sponsored by The Funkie Junkie Boutique and Linda is generously offering a $25 gift certificate to the lucky CC3C winner. Thanks Linda!

The Funkie Junkie Boutique


That's all for me today, take care everyone.
Lisa xx

Monday, August 10, 2015

More Fun with Finnabair


Finnabair's Time Capsule class project


I said a few weeks ago that I'd share the second class project that I made from my two day class with Finnabair but never did. It honestly slipped my mind with the craziness that has been my life this summer. I took the opportunity to get some home improvement projects done with my daughter home from college and as usual one project turned into another... :)

I'm back now to share my mixed media canvas from Finn's Time Capsule class. In the class we made three canvases however I'm only sharing my middle canvas for now. I have plans to personalize the side panels with photos of my mom and my late MIL. The trio will hang in my guest bedroom that honors the two of them. Hopefully I can get that done soon. 


The Flaming Hearts Ex Votos II relic by Sandra Evertson was part of our kit and it was altered with Finn's mixed media products

Various shades of mica powder bring this canvas to life. 

Prima blooms + Mechanicals make a beautiful bouquet.

Can you tell what my favorite product on this canvas is?

Before I tell you what it is let me say how much I love Finn's stencils. They are sturdy and super easy to work with, I used the Honeycomb stencil on my background with White Sand-Texture Paste.  

Ok, my favorite product is her Gold Mica Powder! 
When I mixed it with water and sprayed a coat over my canvas...pure magic happened!!

Finn's Bottle Cap Mechanicals were layered then filled with Crystal Glass Beads and Platinum Glass Glitter.  


I love the softness of this canvas. 


I highly recommend that you take one of her classes if you get the opportunity. You'll see for yourself what an awesome teacher she is and I loved getting feedback from her. She certainly inspired me to create something every day. I have a ton of stuff coming up in the next few months here on my blog and I can't wait to share it with all of you.  


This is our selfie which I am so proud of. It was two busy but totally fantastic days of creative fun!!! I don't know how she keeps the hectic schedule she's on with her North American tour but I'm so grateful she came so I could take her classes. Thanks Finn!!!

Thanks for looking, have a wonderful week.
Lisa xx


Thursday, August 6, 2015

Post It Note Box and Cover Set from The Cafe


Regina asked us to share samples of this set for The Cutting Cafe's  DT post on the 7th and I was tickled! Post it notes are so handy to jot down a quick note and now I have one to record phone messages and the other to record items I need to pick up from the craft store. :)


I used two shades of blue cardstock for the covers and ephemera and borders from Graphic 45's Bird Song and Typography collections. The edges were distressed with Black Soot Distress Ink and Velcro 3/8" circles were used to fasten the wrap bands together. The cover fits a 3x3 post it note pad.

Typography ephemera and border, label is from the set.


My second set...


Bird Song stickers and border, label is from the set.


Regina created a box that holds four post it note pads (which I did not create) but you can see her sample below. I'm thinking these would make great gifts for teachers or anyone who likes to keep track of things. :)

Post it note box
Designed by Regina Easter

Postit note 1
Designed by Regina Easter


The Cutting Cafe


Please pay a visit to TCC's blog on the 7th to see all of the inspiration by the DT. If you leave a comment you'll be entered into a drawing to win 3 Free Sets. The winner will be announced on the 21st. 

Thanks for visit today!
Have a wonderful weekend, wherever you are.
Lisa xx
Related Posts Plugin for WordPress, Blogger...